So, been rather busy as of late but I figured it was time to start a new thread for the current project I am working on.
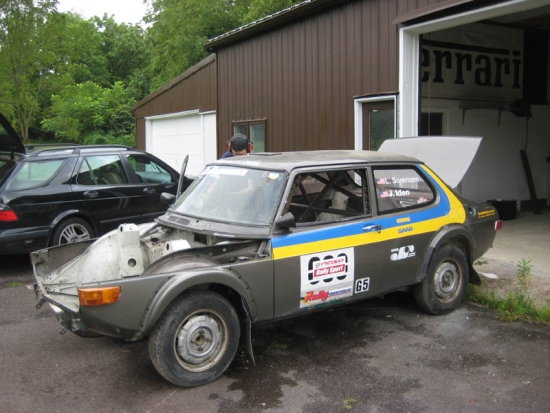
The car may look familiar to some of you, and it should, it was the first rally car that the team built almost 6 years ago. It served as our main rally car for 4 seasons and almost 20 rallies. With the launch of the car's successor last season, a very well prepared 1974 EMS, the car was stripped and canabalized for parts including its complete drivetrain.
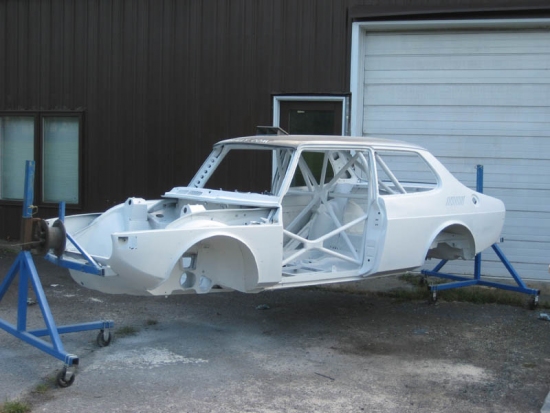
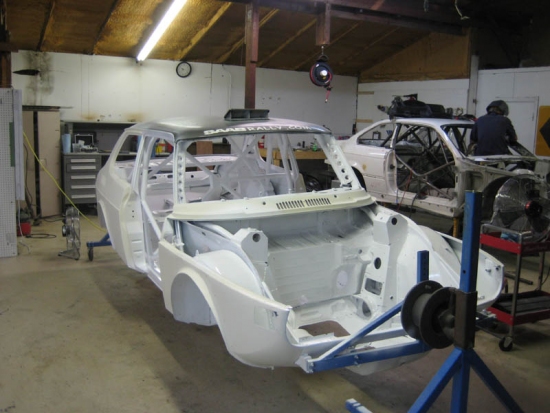
Now that the '74 has been rallied, rolled and rebuilt and is generally considered to be proven and sorted, it was decided that some time should be spent on restoring the former car to its well deserved glory.
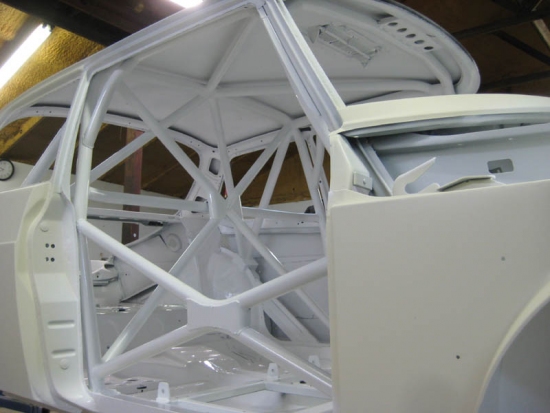
This project will represent a bit of a departure from the type route I have taken in the past, it will emphasize keeping the car as close to period correct as possible, while not discounting allowances for modern convienance, reliability and safety. In short: every effory will be made to make it a historic class rally car, where it is deemed practical/economical to do so. There will be no turbochargers and no carbon fiber. The project timeline does not have a hard stop date; at this time there is no need to make a frantic push, so do not expect daily updates. But as we slowy progress though the project, I will post updates. Much work has already begun, so lets get started:
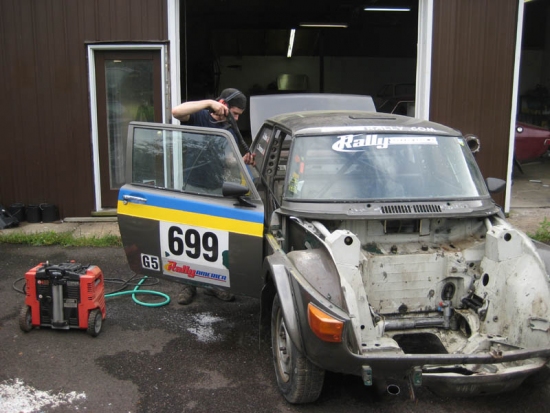
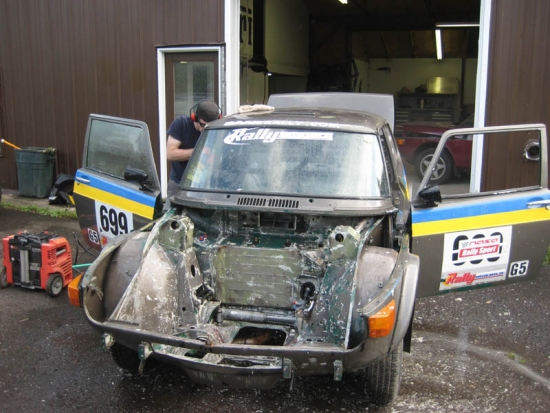
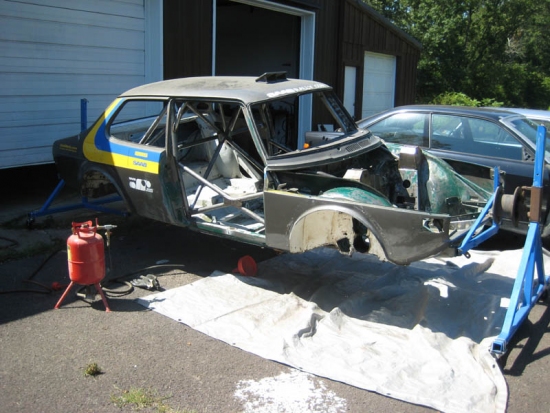
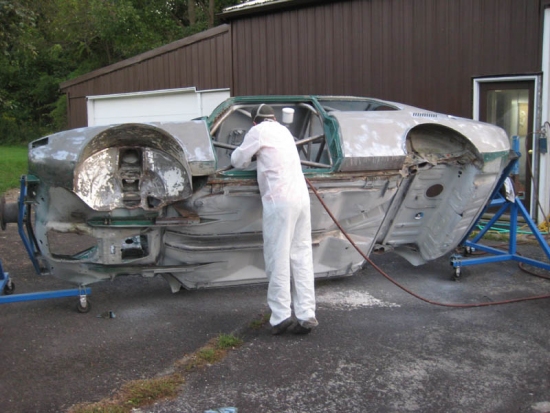
The car as it sat:
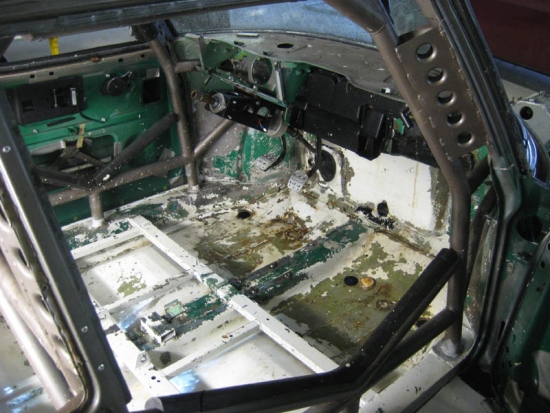
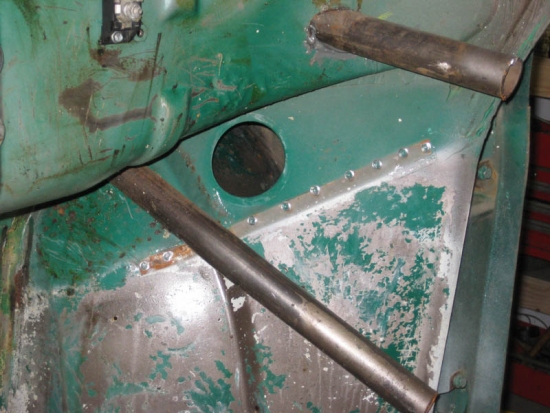
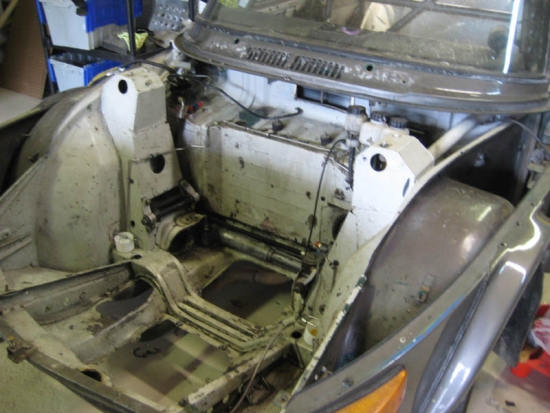
Engine bay is dirty as well as interior, paint is heavily peeling.
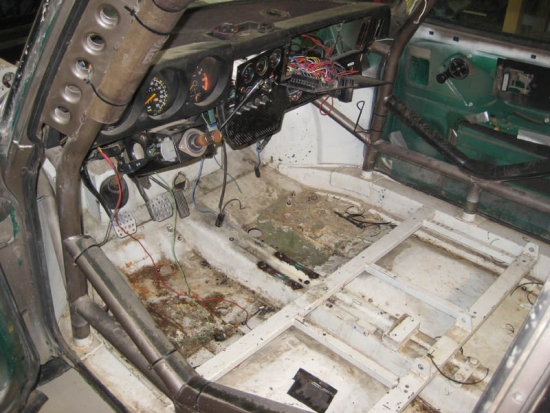
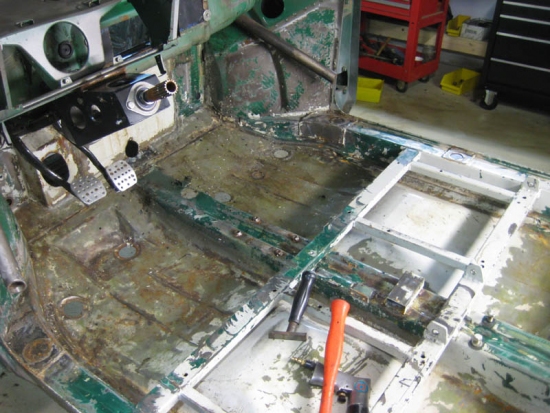
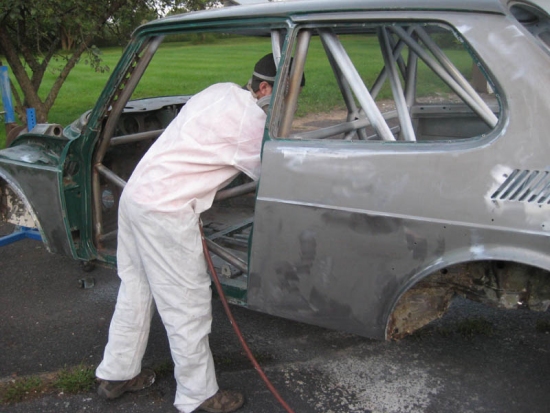
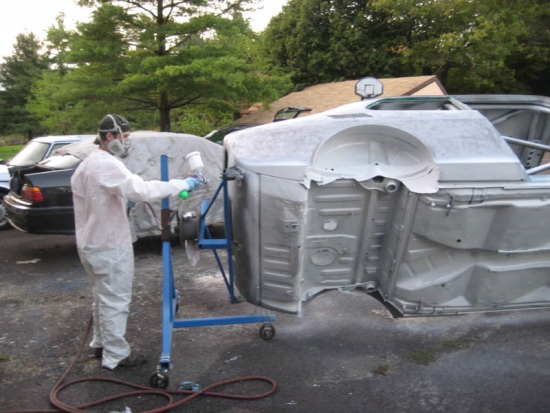
Pressure washing takes care of a good portion of the paint:
'75 99 Rally Car Restoration
Re: '75 99 Rally Car Restoration
Next I had the task of removing the existing roll cage. The cage would have needed substantial updates to be eligable for a new rally log book. It was a tough decision but I decided that the best option would be to start from scatch as it would result in a much better end result for only a little more time and money than adding onto the existing cage. The cage was heavily tabbed into the body shell and did not come out without a fight... but eventually the sad task of undoing ones own work was completed.
- Geoff
- Team Turbo Troll Crew
- Posts: 3890
- Joined: Fri Oct 20, 2006 3:31 pm
- Nickname: Geoff
- Number of Saabs currently owned: 6
- Location: Nude Humpshire
Re: '75 99 Rally Car Restoration
When you cut it out did the legs pop out of place or just sit where they were cut? When we cut Mike's cage out the legs popped out of position... by a few inches.
The kind of dirty that doesn't wash off
Re: '75 99 Rally Car Restoration
Ok, now that the old cage is out of the way, its time to install a new one!
The cage design follows the most current FIA article 253 for rally cars.
Lots of tube bending:
Notching:
Grinding:
and welding!
The cage design follows the most current FIA article 253 for rally cars.
Lots of tube bending:
Notching:
Grinding:
and welding!
Re: '75 99 Rally Car Restoration
An overview of the steps:
1. The main hoop is bent and mocked up into place along with the side hoops:
2. The windshield bar is fitted
3. The roof reinforcment diagonals are fitted.
4. The entire front half the cage, side hoops, windshield bar and dash bar are welded together.
5. The main hoop tack welds are broken and the front half of the cage is dropped down to allow welding along the backside of all junctions.
6. The front half of the cage in pushed back up into place and welded to the main hoop. (notice that the main cage legs are dropped down into a hole in the sill to allow welding on the backside of the junctions)
Thats just the basic foundation of the cage!
- Jordan
- Site Admin
- Posts: 4068
- Joined: Fri Oct 13, 2006 2:38 pm
- Number of Saabs currently owned: 6
- Location: Vernon, CT
- Contact:
Re: '75 99 Rally Car Restoration
Cool! we should add that info to the much forgotten Saab Rally Manual.
Re: '75 99 Rally Car Restoration
cage work continues:
The cage unit is slid as far back into the chassis as possible and the door bars are fitted. This allows easier welding on the door bars as they are not directly in line with the A and B pillars.
Once the door bars are completed and welded the cage is slid foward back into place.
The cage unit is slid as far back into the chassis as possible and the door bars are fitted. This allows easier welding on the door bars as they are not directly in line with the A and B pillars.
Once the door bars are completed and welded the cage is slid foward back into place.
Re: '75 99 Rally Car Restoration
Now that the main cage is complete, the rear section comes into place rather quickly.
Next the gussets are fabricated for the critical junctions.
- Geoff
- Team Turbo Troll Crew
- Posts: 3890
- Joined: Fri Oct 20, 2006 3:31 pm
- Nickname: Geoff
- Number of Saabs currently owned: 6
- Location: Nude Humpshire
Re: '75 99 Rally Car Restoration
Looks nice!
Why didn't you make the main hoop sit a little further back?
The kind of dirty that doesn't wash off
Re: '75 99 Rally Car Restoration
Geoff wrote:Looks nice!
Why didn't you make the main hoop sit a little further back?
Well, honestly the way the lengths worked out and because I had some lengths left over from the other car, I would have had to buy a whole other mill length piece of tubing to extend it back any further, and this is the same place that both my other cars are, should be fine for any driver up to 6' or so.
- Geoff
- Team Turbo Troll Crew
- Posts: 3890
- Joined: Fri Oct 20, 2006 3:31 pm
- Nickname: Geoff
- Number of Saabs currently owned: 6
- Location: Nude Humpshire
Re: '75 99 Rally Car Restoration
Luke wrote: should be fine for any driver up to 6' or so.
haha, it's a Mongo-free car
The kind of dirty that doesn't wash off
- matt
- Turbo Troll Crew Chief
- Posts: 988
- Joined: Wed Sep 20, 2006 4:43 pm
- Number of Saabs currently owned: 0
- Location: Pittsfield MA
Re: '75 99 Rally Car Restoration
no good for matt either *cries*
"we changed a flat in 4 minutes, twice"
1994 9000 Aero (intake, stg 4 ecu, 3" TBE, clutch + broken trans mod) *sold*
2001 Subaru Outback Wagon *sold*
2006 Subaru WRX Wagon I'm back on boost!
1994 9000 Aero (intake, stg 4 ecu, 3" TBE, clutch + broken trans mod) *sold*
2001 Subaru Outback Wagon *sold*
2006 Subaru WRX Wagon I'm back on boost!
Re: '75 99 Rally Car Restoration
And work continues....
The cage is done so the next step is paint.
The shell is pushed outside and abrasive blasted anywhere there is surface rust
Then the exterior and underside are stripped to bare metal:
Next up, paint!
Two coats of SPI epoxy primer on bare metal, then 2k white urethane and clear on interior and underside and high build primer on the exterior for sanding.
- Crazyswede
- Team Turbo Troll Crew
- Posts: 4540
- Joined: Fri Sep 22, 2006 3:53 pm
- Nickname: Mongo
- Number of Saabs currently owned: 97
- Location: Vermont
- Contact:
Return to “Projects and Build Threads”
Who is online
Users browsing this forum: No registered users and 10 guests