1980 99 GLi
-
SwedeSport

- Posts: 3021
- Joined: Mon Jun 15, 2009 9:52 am
- Number of Saabs currently owned: 5
- Location: Pottstown, PA
- Contact:
Re: 1980 99 GLi
I would say that the if you got the inner fitment correct, the quarter skin would probably close in on the gap if you jacked the rear corner up a little before you weld it. Im sure its gonna give there much easier than anywhere else. I would imagine you supported it on 4 stands before cutting it up?
Swedesport Motors, Apparel and Accessories for SAAB Junkies.
Http://Facebook.com/swedesportmotors
Swedesportmotors@gmail.com
Http://Facebook.com/swedesportmotors
Swedesportmotors@gmail.com
-
Geoff

- Team Turbo Troll Crew
- Posts: 3893
- Joined: Fri Oct 20, 2006 3:31 pm
- Nickname: Geoff
- Number of Saabs currently owned: 6
- Location: Nude Humpshire
Re: 1980 99 GLi
Some updates...
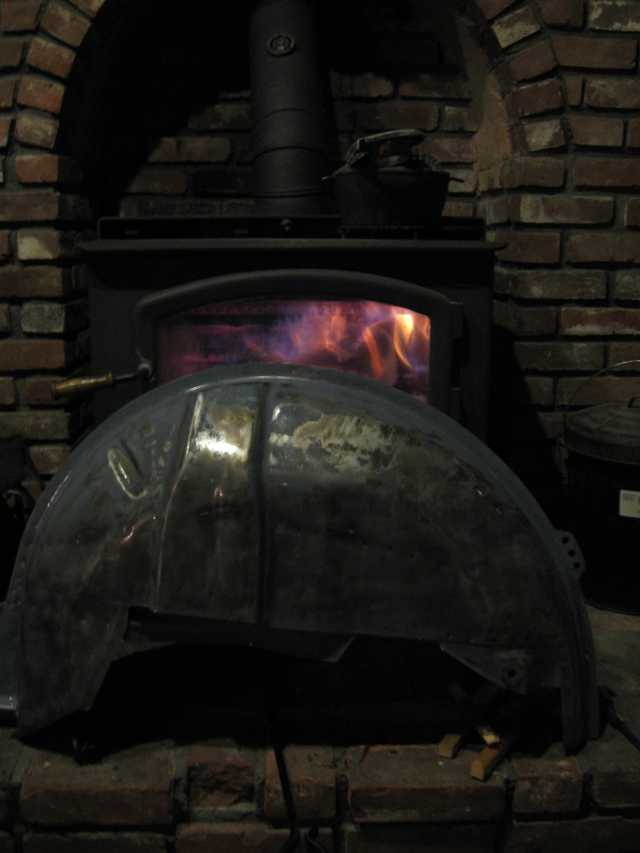
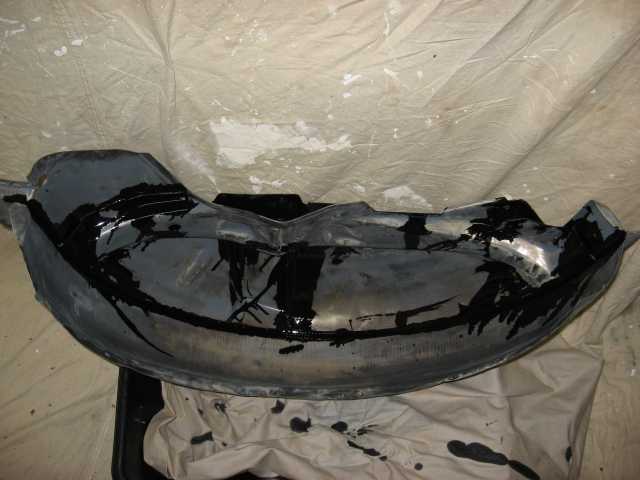
I had to get some prep work done before I start putting the replacement panel in. I cleaned the surface rust and as much loose paint off the new panel as I could with a grinder with a wire wheel. Some paint was in good shape so I just roughed it up. I then cleaned it with the POR 15 Marine Clean and then prepped it with their Metal Ready. That stuff really made a change and got rid of any remaining surface rust. I then washed it well and needed to dry it. We had a few cool nights back in May so I figured I'd force it dry:
Then I painted the seams and tried to get everywhere I could with POR 15, leaving most of it (and all the sections that need to be welded) bare for now.
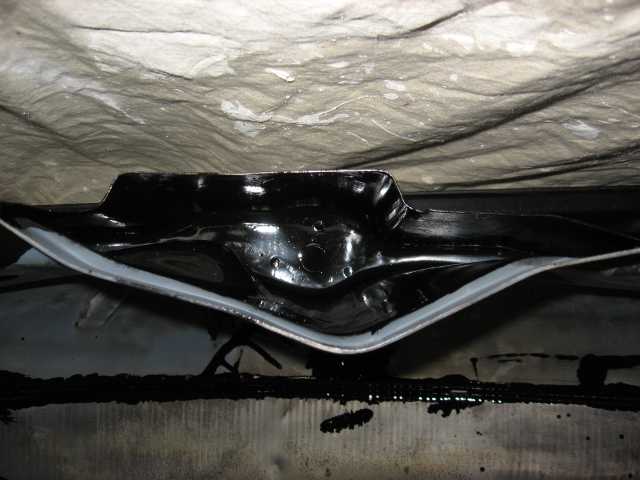
I was able to get up inside the shock mount and the tunnel that runs front to back in that area. I don't think these ever got much paint, if any, at the factory hence one of the reasons why shock mounts like to blow out.
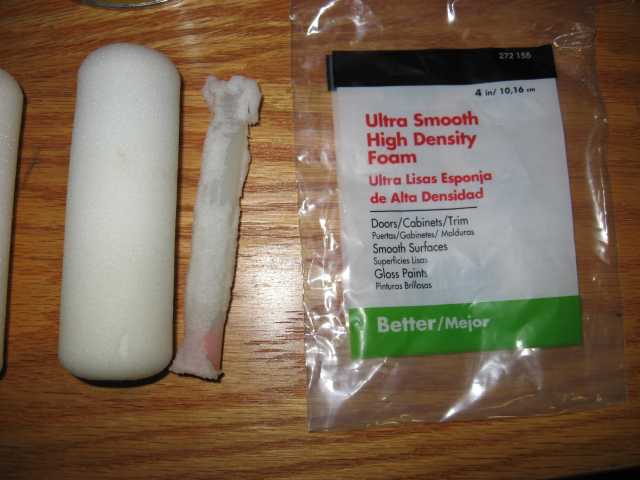
To get inside those areas I took a small 4" foam paint roller from the hardware store, stripped the foam off the core and mounted the foam onto a stiff piece of welding rod which I ran through the tunnel.
Paint dribbled out through the seams which tells me I got a good coat in there and between the seams.
I had to get some prep work done before I start putting the replacement panel in. I cleaned the surface rust and as much loose paint off the new panel as I could with a grinder with a wire wheel. Some paint was in good shape so I just roughed it up. I then cleaned it with the POR 15 Marine Clean and then prepped it with their Metal Ready. That stuff really made a change and got rid of any remaining surface rust. I then washed it well and needed to dry it. We had a few cool nights back in May so I figured I'd force it dry:
Then I painted the seams and tried to get everywhere I could with POR 15, leaving most of it (and all the sections that need to be welded) bare for now.
I was able to get up inside the shock mount and the tunnel that runs front to back in that area. I don't think these ever got much paint, if any, at the factory hence one of the reasons why shock mounts like to blow out.
To get inside those areas I took a small 4" foam paint roller from the hardware store, stripped the foam off the core and mounted the foam onto a stiff piece of welding rod which I ran through the tunnel.
Paint dribbled out through the seams which tells me I got a good coat in there and between the seams.
The kind of dirty that doesn't wash off 
-
Geoff
- Team Turbo Troll Crew
- Posts: 3893
- Joined: Fri Oct 20, 2006 3:31 pm
- Nickname: Geoff
- Number of Saabs currently owned: 6
- Location: Nude Humpshire
Re: 1980 99 GLi
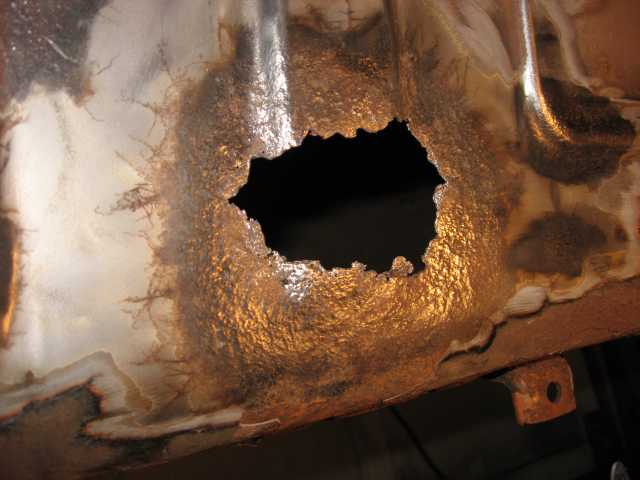
This nice hole showed itself after I pulled the gas tank out. This is where the gas tank sits up against the spare tire well in the trunk.
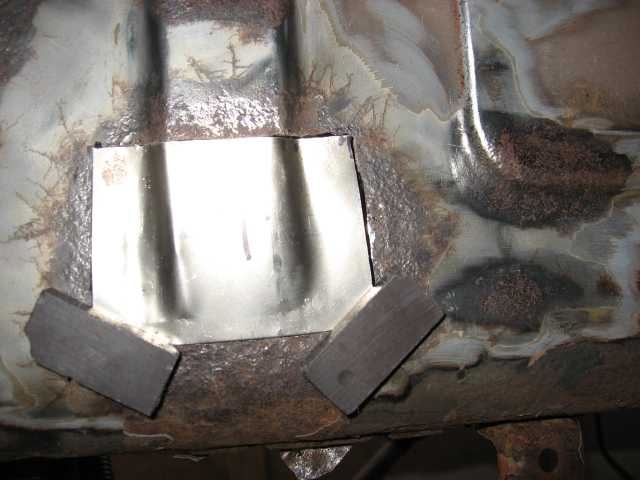
I cut a piece of new sheet metal, bent it to shape using a vice and pliers, traced it onto the car, and cut a section out of the car

Using magnets to hold the new piece in place
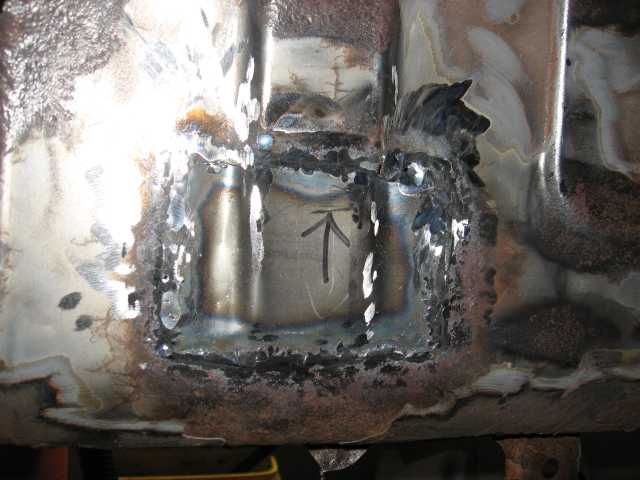
Welded and ground relatively flush
I cut a piece of new sheet metal, bent it to shape using a vice and pliers, traced it onto the car, and cut a section out of the car
Using magnets to hold the new piece in place
Welded and ground relatively flush
The kind of dirty that doesn't wash off
-
Geoff
- Team Turbo Troll Crew
- Posts: 3893
- Joined: Fri Oct 20, 2006 3:31 pm
- Nickname: Geoff
- Number of Saabs currently owned: 6
- Location: Nude Humpshire
Re: 1980 99 GLi
Oh look, that hole brought friends!
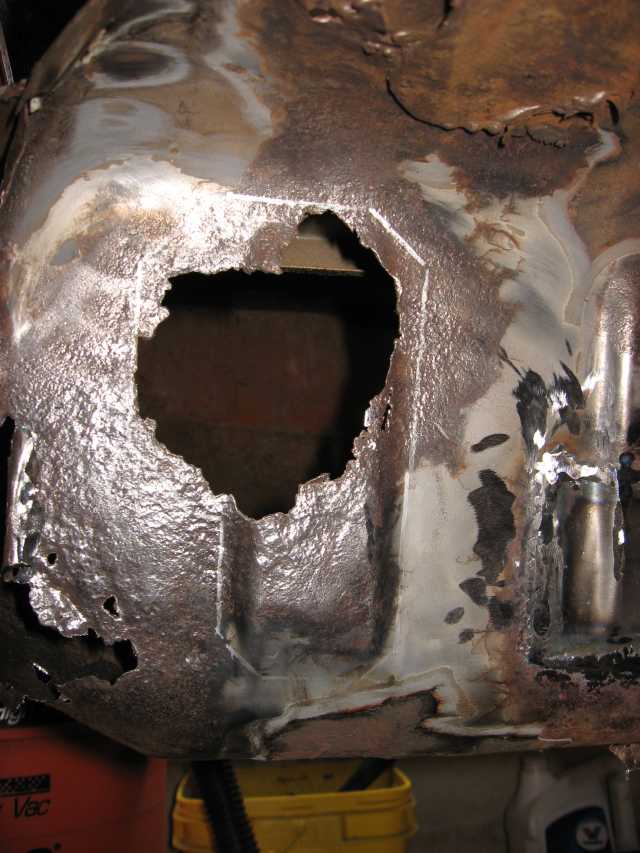
Same drill here except I had a hard time bending a piece to fit and match the raised section of the body, so I just cut it all out and put in a flat piece
I've been using a combination of an angle grinder with a cutoff wheel and a jig saw with a metal blade to make the cuts. Sawzalls are too bulky for this work.
The kind of dirty that doesn't wash off
-
Geoff
- Team Turbo Troll Crew
- Posts: 3893
- Joined: Fri Oct 20, 2006 3:31 pm
- Nickname: Geoff
- Number of Saabs currently owned: 6
- Location: Nude Humpshire
Re: 1980 99 GLi
A little more work...
Someone at one point patched a hole in the trunk floor using two or three pieces of heavy gage steel and some silicone bathroom caulking. The caulking and the overlapping layers of steel were capturing moisture and causing more rust.
After cleaning the area and exposing the solid remains:
You can see where the body had rusted away from the welds. You can also see the underside in the two pictures in the post above.
That whole area cut out and new sheet metal formed:
Welded, ground flat, and painted:
The kind of dirty that doesn't wash off
-
saabfan9

- Posts: 447
- Joined: Wed Nov 02, 2011 2:21 pm
- Number of Saabs currently owned: 4
- Location: Chicago
Re: 1980 99 GLi
good job man..i know for a fact i would not have been able to stay with this very intimidated by all the rust
-
Jordan

- Site Admin
- Posts: 4068
- Joined: Fri Oct 13, 2006 2:38 pm
- Number of Saabs currently owned: 6
- Location: Vernon, CT
- Contact:
Re: 1980 99 GLi
So which welder did you end up getting?
-
Geoff
- Team Turbo Troll Crew
- Posts: 3893
- Joined: Fri Oct 20, 2006 3:31 pm
- Nickname: Geoff
- Number of Saabs currently owned: 6
- Location: Nude Humpshire
Re: 1980 99 GLi
saabfan9 wrote:good job man..i know for a fact i would not have been able to stay with this very intimidated by all the rust
I just have to take it a little bit at a time. I would like to get it back to rolling again soon so it isn't hogging the garage...
Jordan wrote:So which welder did you end up getting?
I got a Lincoln 180C "Power Mig".
http://www.lincolnelectric.com/en-us/Equipment/Pages/product.aspx?product=K2473-1(LincolnElectric)
There was (maybe still is?) a discount for SCCA members which took about 30% off the list price. I'm happy with it. I can produce clean consistent welds when the base material is thick enough (as long as I remember to turn the gas on, duh).
The kind of dirty that doesn't wash off
-
Geoff
- Team Turbo Troll Crew
- Posts: 3893
- Joined: Fri Oct 20, 2006 3:31 pm
- Nickname: Geoff
- Number of Saabs currently owned: 6
- Location: Nude Humpshire
Re: 1980 99 GLi
It's about time I post some updates.
Here's the new inner fender section being put into place.
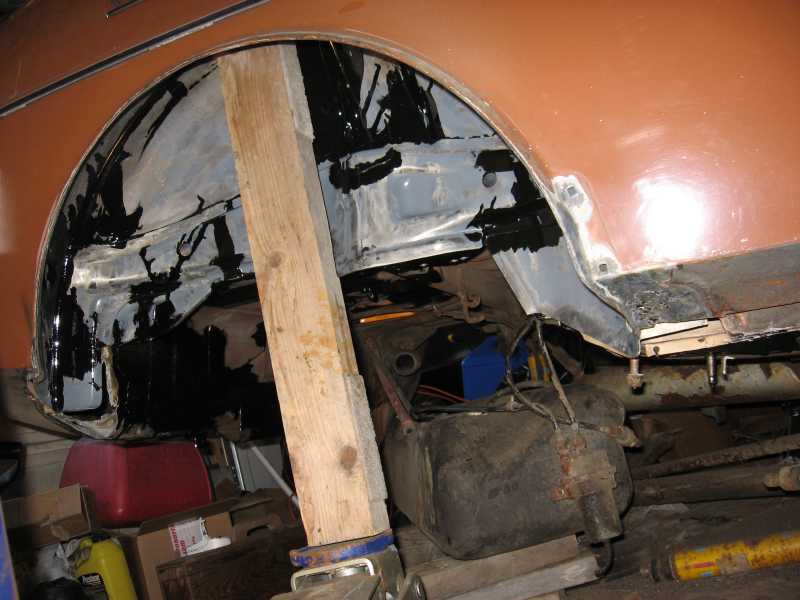
I got it to fit OK on the inside
Used Drew's idea about ratchet straps along with the stock jack and a piece of 2x4 to get things to line up on the outer lip after welding the inside in place
Some clamps
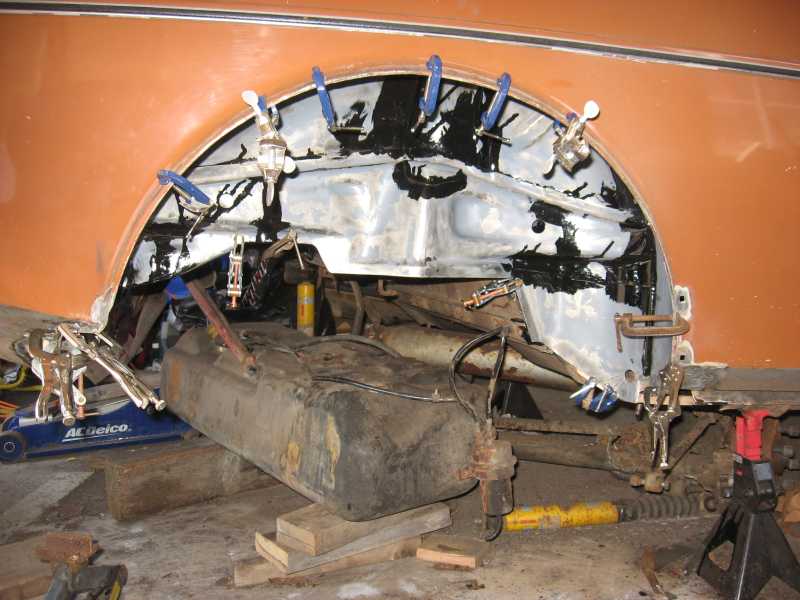
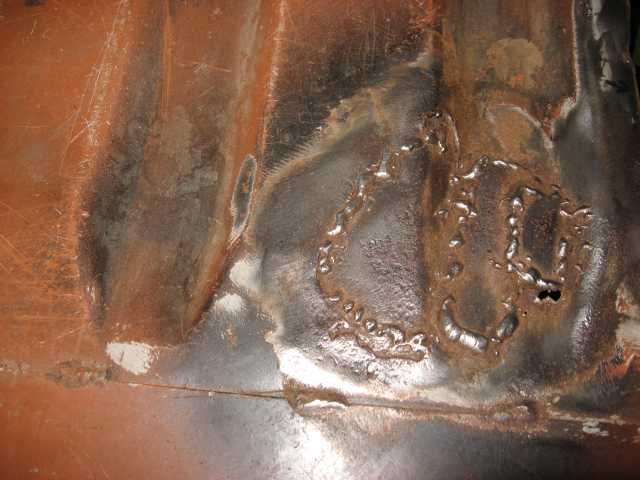
I used a spot welder in some places to pinch the seams and replicate factory welds

Overall it came out OK. The quarter panel still isn't right and if I were to repaint it I'd need to put some filler in some areas that aren't quite straight, especially around the top of the arch. I think that might be due to the car being rear-ended which caused that distortion before I took the old inner fender out.
Here's the new inner fender section being put into place.
I got it to fit OK on the inside
Used Drew's idea about ratchet straps along with the stock jack and a piece of 2x4 to get things to line up on the outer lip after welding the inside in place
Some clamps
I used a spot welder in some places to pinch the seams and replicate factory welds
Overall it came out OK. The quarter panel still isn't right and if I were to repaint it I'd need to put some filler in some areas that aren't quite straight, especially around the top of the arch. I think that might be due to the car being rear-ended which caused that distortion before I took the old inner fender out.
The kind of dirty that doesn't wash off
-
Geoff
- Team Turbo Troll Crew
- Posts: 3893
- Joined: Fri Oct 20, 2006 3:31 pm
- Nickname: Geoff
- Number of Saabs currently owned: 6
- Location: Nude Humpshire
Re: 1980 99 GLi
If you'd like I could send you a chip of paint that you could carry around in your pocket. 
The kind of dirty that doesn't wash off
-
DrewP

- Posts: 2084
- Joined: Wed Dec 26, 2007 8:27 pm
- Nickname: TANK
- Number of Saabs currently owned: 1
- Location: Monrovia, CA
Re: 1980 99 GLi
This is awesome. I'll post some photos of the tools I had to make to strip 9000 gearboxes when I get a chance, but this is glorious.
I actually like the color, looks good on the 99.
I actually like the color, looks good on the 99.
"You can educate ignorance, but you can't fix stupid."
-
Geoff
- Team Turbo Troll Crew
- Posts: 3893
- Joined: Fri Oct 20, 2006 3:31 pm
- Nickname: Geoff
- Number of Saabs currently owned: 6
- Location: Nude Humpshire
Re: 1980 99 GLi
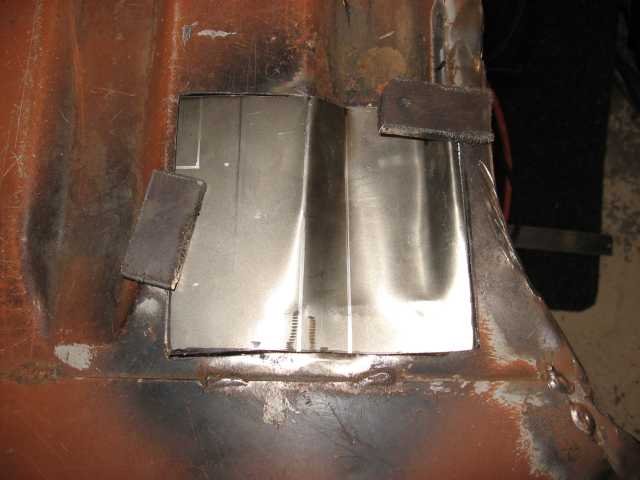
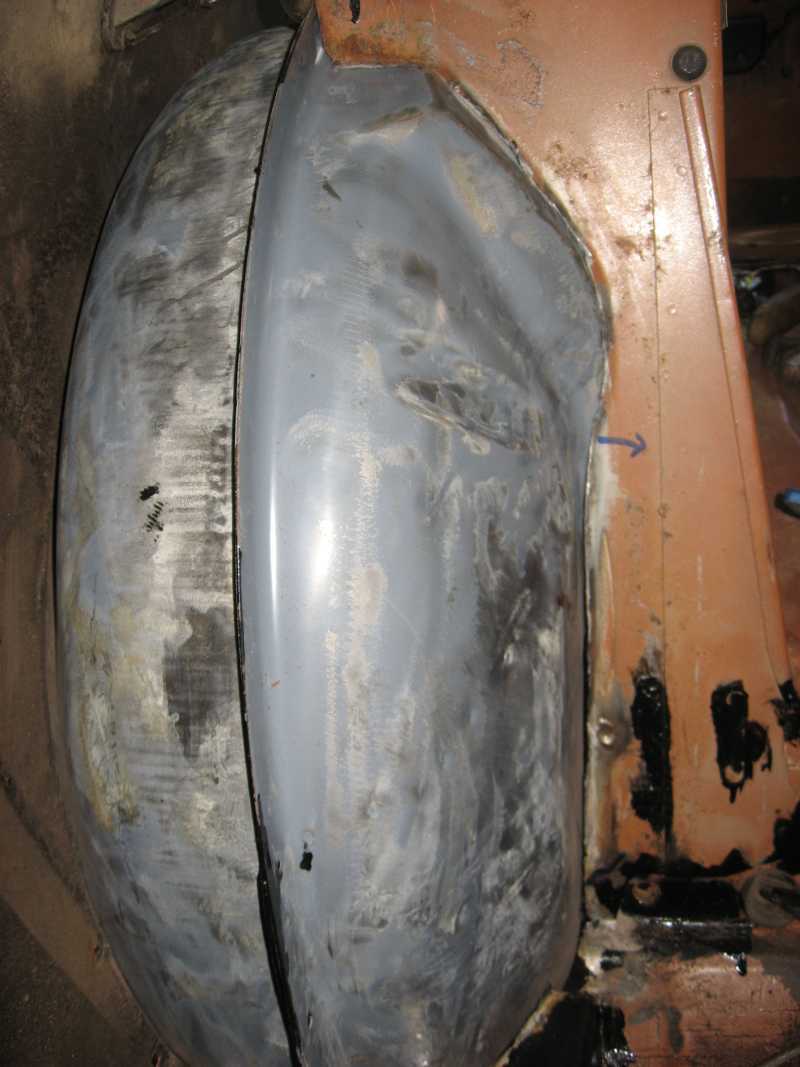
To get the old panel out and the new one in I had to remove a section of sheet metal from the bottom corner of the quarter panel.
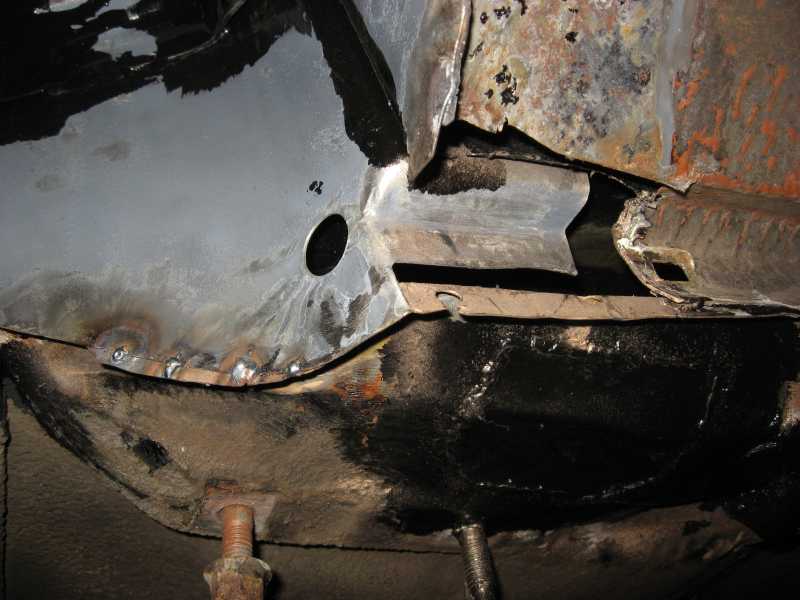
It's actually two pieces; one from the quarter panel and another short piece that mates to the seam. They join together at the top of the small arch between the seam and the quarter panel. I could have re-used those two pieces but it seemed like kind of a pain so I made this and welded it in instead.

It's actually two pieces; one from the quarter panel and another short piece that mates to the seam. They join together at the top of the small arch between the seam and the quarter panel. I could have re-used those two pieces but it seemed like kind of a pain so I made this and welded it in instead.
The kind of dirty that doesn't wash off
-
RadioFlyer

- Posts: 918
- Joined: Wed Oct 05, 2011 11:08 am
- Nickname: RadioFlyer
- Number of Saabs currently owned: 7
- Location: Utah
Re: 1980 99 GLi
No kidding. I couldn't have thought of a better tool! Nice job! And that color would look disgusting on any other car. Somehow the 99 pulls it off.
-
Geoff
- Team Turbo Troll Crew
- Posts: 3893
- Joined: Fri Oct 20, 2006 3:31 pm
- Nickname: Geoff
- Number of Saabs currently owned: 6
- Location: Nude Humpshire
Re: 1980 99 GLi
Thanks, I'm constantly cobbling things together to make tools that will work so this was pretty straightforward.
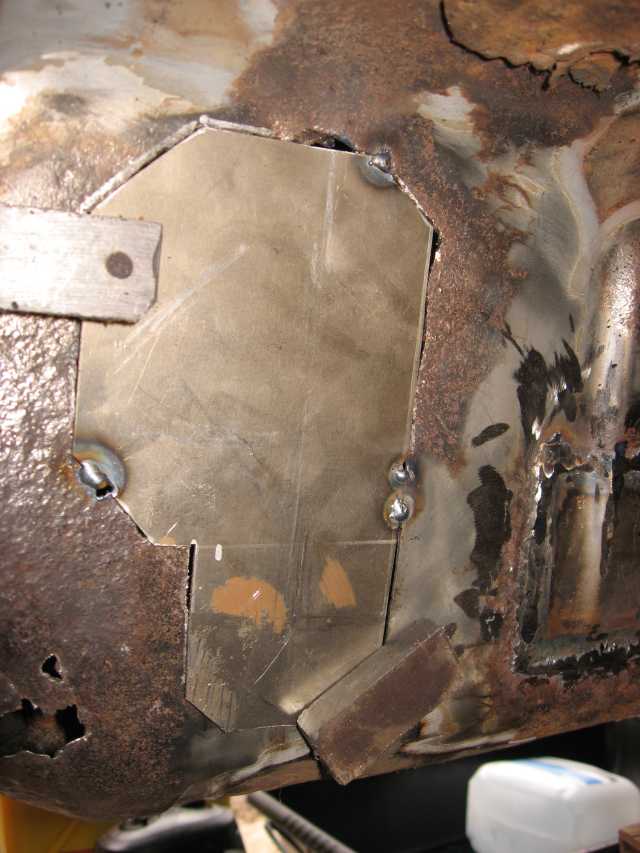
After getting the new inner fender in there was one spot in the back corner where it meets the trunk floor/spare tire well that was all rotted. I had to cut/bend/cut/trim etc. etc. for a while until I got it to fit then slowly welded it in in a star pattern from the outside.
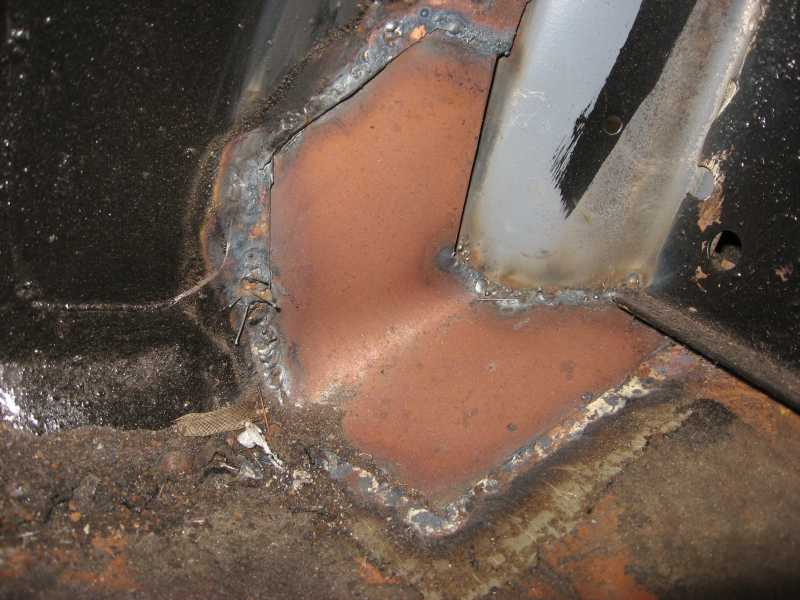
It got a little surface rust on it but some POR 15 Metal Ready will take care of that.
After getting the new inner fender in there was one spot in the back corner where it meets the trunk floor/spare tire well that was all rotted. I had to cut/bend/cut/trim etc. etc. for a while until I got it to fit then slowly welded it in in a star pattern from the outside.
It got a little surface rust on it but some POR 15 Metal Ready will take care of that.
The kind of dirty that doesn't wash off
Return to “Projects and Build Threads”
Who is online
Users browsing this forum: No registered users and 4 guests