1985 SPG Rebuild Again

A place for long term threads surrounding a specific project or SAAB build for motorsports or restoration
User avatar
MattWatson
Posts: 210
Joined: Mon Mar 14, 2011 11:48 am
Number of Saabs currently owned: 3
Location: Alberta, Canada

Re: 1985 SPG Rebuild Again

Postby MattWatson » Wed Jan 23, 2013 9:35 pm

So not a huge amount of progress really. I am waiting on parts for the engine from eeuro so I havn't been in a huge hurry. And other than the one hickup, the 99 has been doing great as a DD.

So I have been filling a couple hours a day with an engine stand adapter project so that I can work on it easier. The worktop I have is designed for woodworking projects, so the table is pretty tall trying to work on the top of the engine.

I took a crapload of pictures in case someone wants to do this on the cheap. Other than the welding wire, I have a grand total of 25$ in parts (I scrounged some) I would have done a few things differenly if I had more scrap steel around to work with as well.

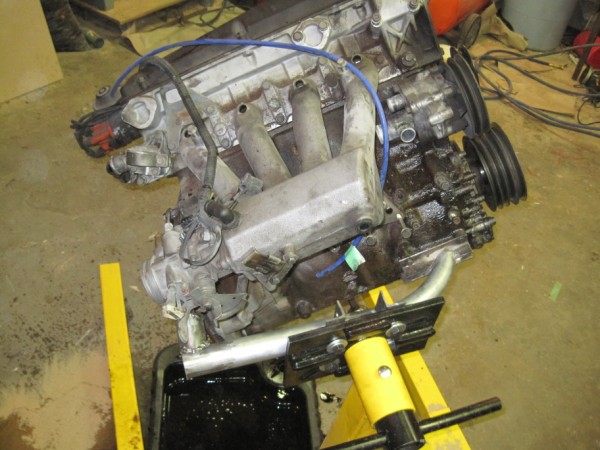
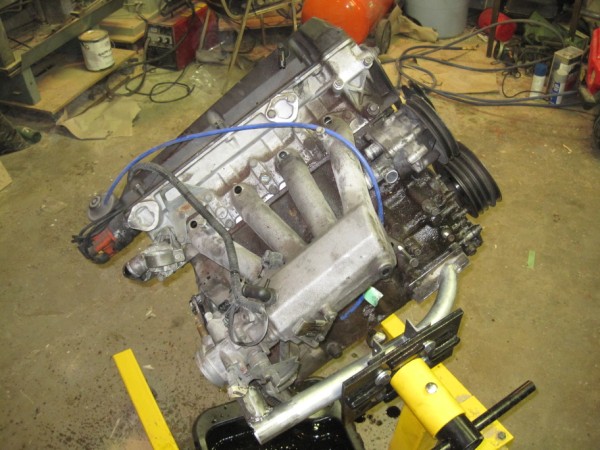
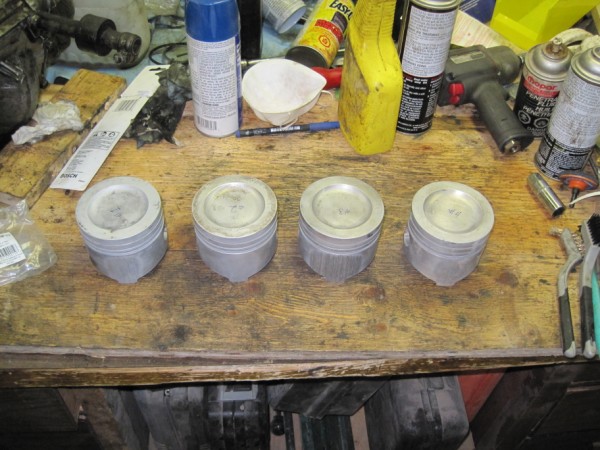
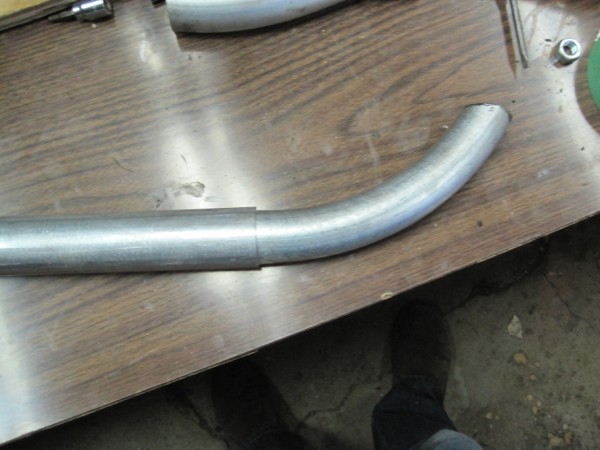
So, this is what I started with:
Image
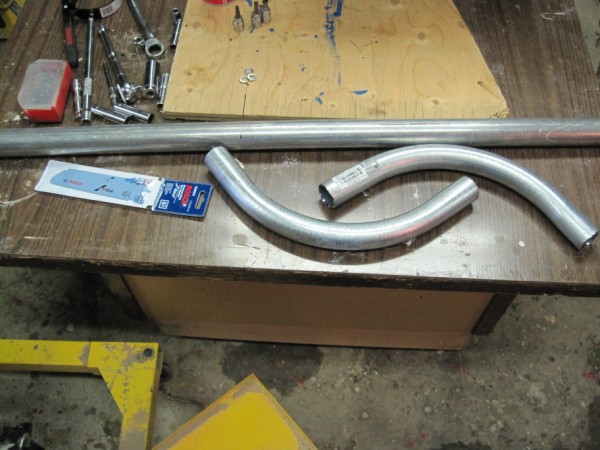
This is the 25$, which consisted of 2 - 1.25" EMT 90 degree elbows, and a 8ft length of 1.5" frost fence post. All of it is galvanized, so everywhere that i did any welding, it was ground off.

I used this occasion to try out my $25 horezontal bandsaw that I picked up from a school auto shop that just wanted to get it out. Worked OK considering the blade was VERY dull, so I went really slow. It was way too slow, and I knew it would be, so I threw the metal blades in the sawzall.
Image

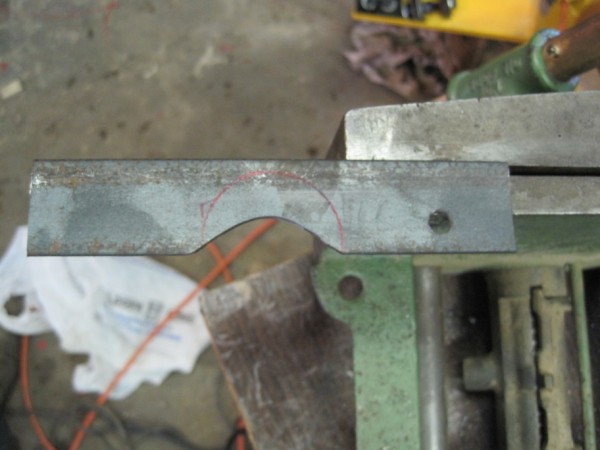
I then cut a short section of the pipe, then split it
Image

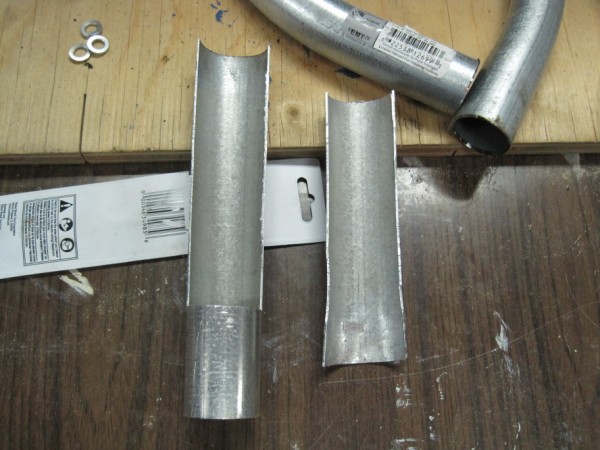
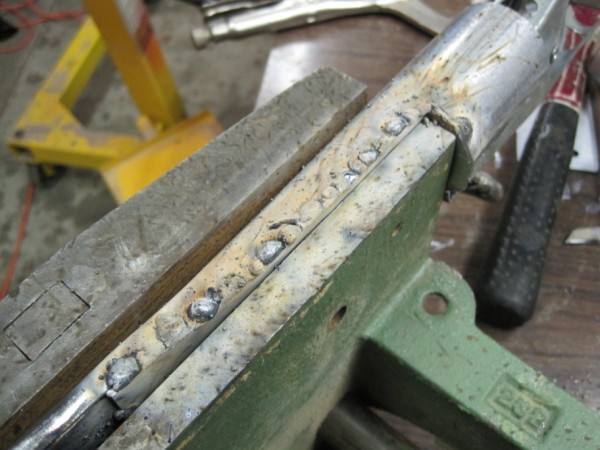
Using a vice, I flattened it out:
Image

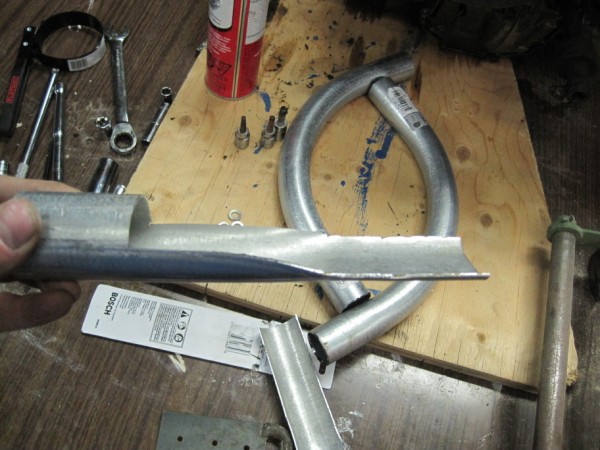
I had a short scrap piece of plate, which was the perfect width, so I ended up clamping it in, then hammering the flattened pipe end around it so that it was held tight.
Image
Image

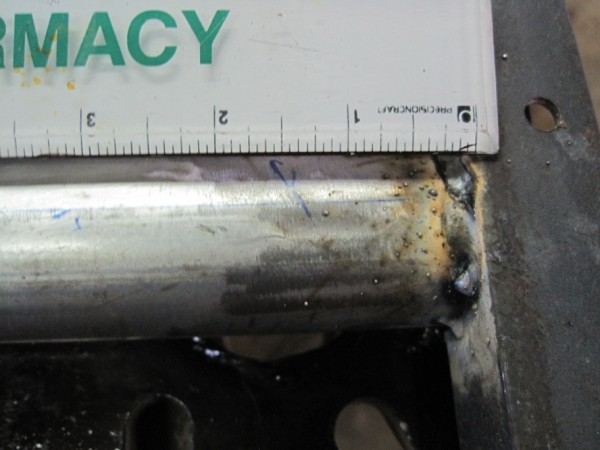
Then I took metal sheet, fitted it, and welded it up to the open section of the pipe:
Image
Image

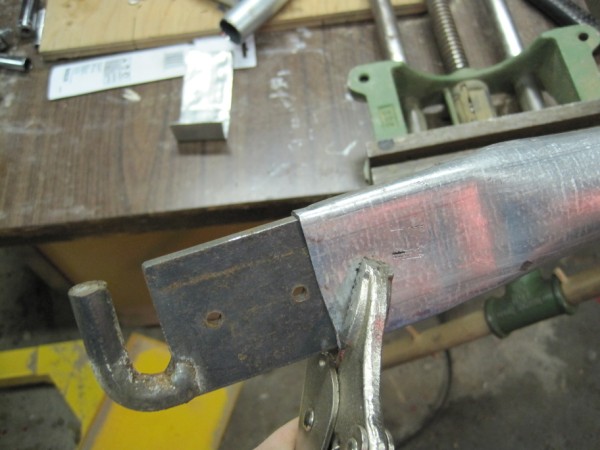
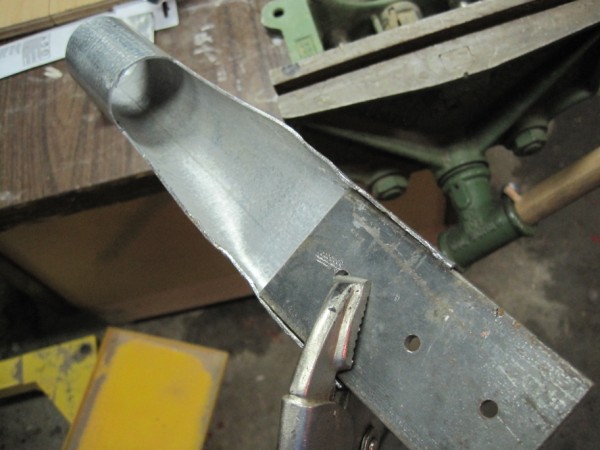
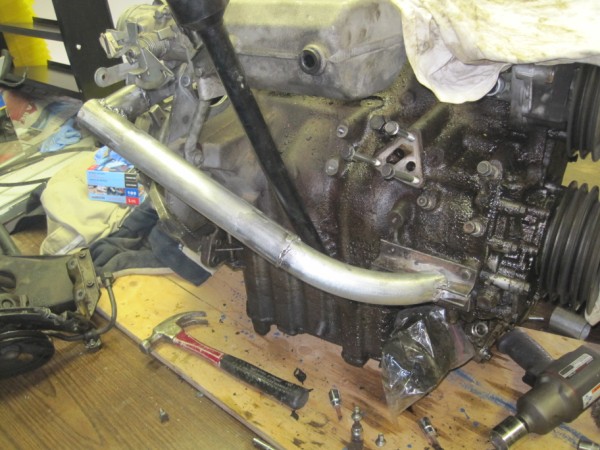
Here it is in place.... needs a bit of trimming:
Image

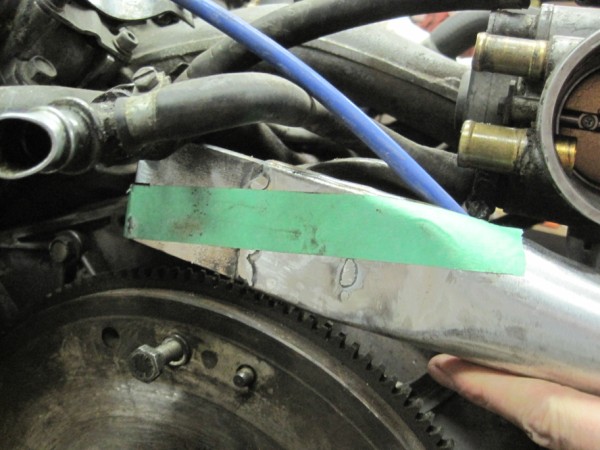
End trimmed, elbow slipped into place for illustration, this is what I was originally intending:
Image

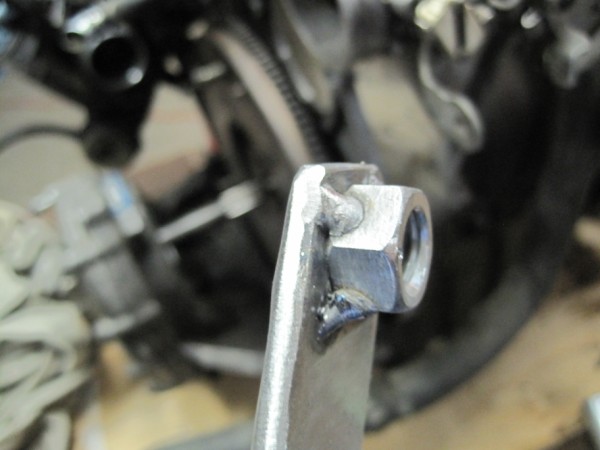
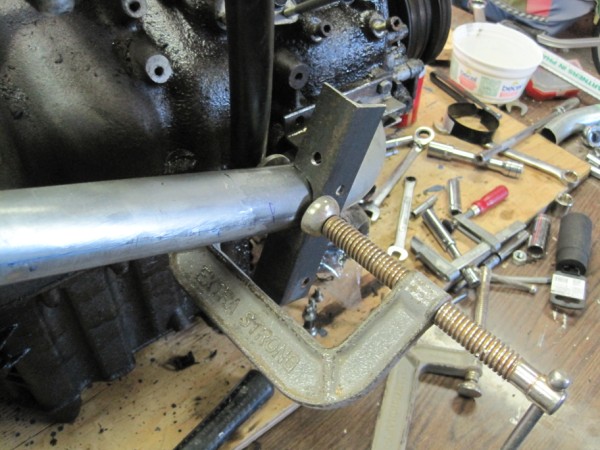
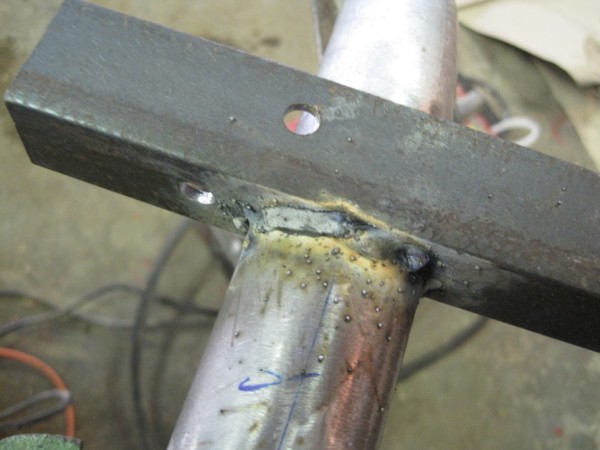
Nut welded on to provide a bit of spacing. After this was welded on I took it to my shop and drilled through both with a drill press.
Image

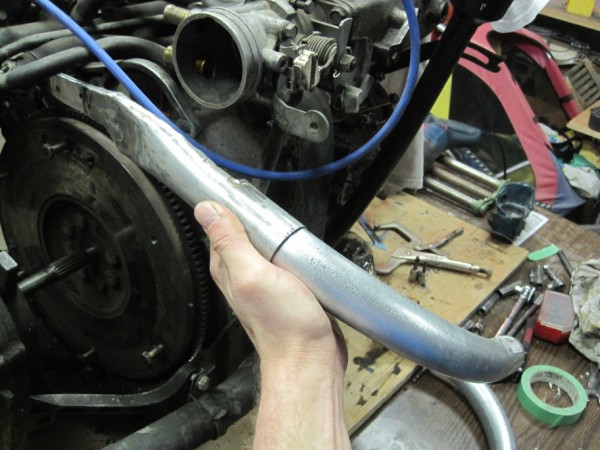
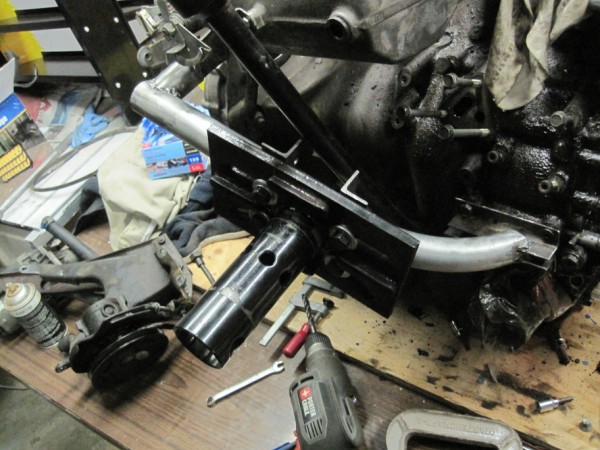
Motor mount elbow trimmed so that there is the proper clearance from the block:
Image

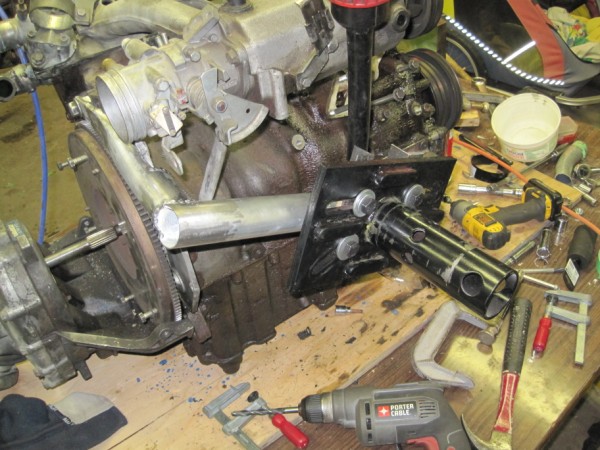
This is one of those areas I would change. I didn't have any more plate around, and be damned if I could find anything around. So two pieces of angle... not the prettiest. I will likely change it after the motor is finished with it's rebuild:
Image

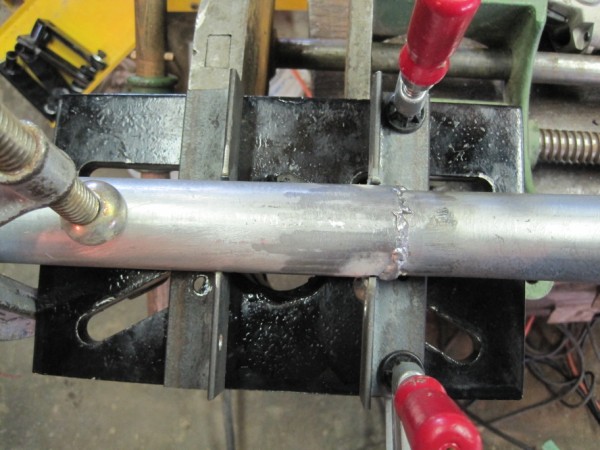
I ditched the 2nd elbow, because it would have offset it to far off of the engine stand. So the piece that attaches to the rear plate got notched and tacked:
Image

Fully welded:
Image
Last edited by MattWatson on Wed Jan 23, 2013 10:14 pm, edited 1 time in total.

User avatar
MattWatson
Posts: 210
Joined: Mon Mar 14, 2011 11:48 am
Number of Saabs currently owned: 3
Location: Alberta, Canada

Re: 1985 SPG Rebuild Again

Postby MattWatson » Wed Jan 23, 2013 9:55 pm

For the attachment to the engine stand, I just used some angle iron:
Image
Notched:
Image

Clamped, leveled and theoretical center marked. I just used the block center for this. It is pretty darn close to ballanced without the transmission:
Image
Welded:
Image

Measure to the center:
Image
And then set up the other side to match the offset, and clamp it to something to ensure they are parallel in both axis:
Image

Welded and drilled for the existing engine mount:
Image
Image

Engine mounted and spinning :yay: :
Image
Image

There is a couple of disadvantages to how this was mounted. Since the angle iron was attached at a 90 degree angle to the adapter arm, the lock hole does not line up with the engine flat. There is no other way of doing it securely unless I used a plate instead. I think that I will just drill a new offset index hole in the stand itself, and then it should sit flat.

It is basically ballanced, with a slight overweight to the flywheel. With it off, it might be almost ballanced. I can tilt it to about 45degrees before it will self rotate leaving it alone. Doesn't take much effort to stop it, so it is not terribly bad.

User avatar
MattWatson
Posts: 210
Joined: Mon Mar 14, 2011 11:48 am
Number of Saabs currently owned: 3
Location: Alberta, Canada

Re: 1985 SPG Rebuild Again

Postby MattWatson » Sun Jan 27, 2013 11:35 pm

So I gave myself the weekend to have the engine apart, and checked to order all the parts I need to finish this off... that being bearings and rings.

Bare block:
Image

All of the cylinder walls are pretty much the same. Some cross-hatching still visable, nice and smooth with no feel-able step or grooves at the top or bottom of section where the rings were wearing. Should only take a quick ball-honing to break the glaze on the cylinders.
Image

Everything pulled out. pistons came out really easily, however rod #4's cap took a decent effort to get off... I had to tap the studs to get the cap off. Even on the bench it is pretty tight, the others are similar to what I am used to however, just wiggle a bit then they came off.
Image

Bottom end looks like it is in pretty good shape. Here is the best #5 main bearing. Pretty much looks like no discernable wear at all.
Image

Here is the worst. Everything but #5 have a bit of wear, but this one is 100% worse then the rest. The others I would consider leaving alone, but given this one, I likely will replace them all.
Image

Now for the Ugly (I think?) This is on ALL of the pistons to exactly the same degree. I assume this is caused by piston slap... but now the question... can these be re-used, or do I need to replace the set?
Image

Here is the head. I assume this will have to be completely rebuilt. Given that the bores are in really good shape, guides would likely be the next culprit correct? However, if I replace the pistons, I likely need to find a new head anyway, since I hear this engine has the high compression head to compensate for the 8v pistons correct?
Image

Any thoughts, opinions etc? I dont really want to spend a huge amount more on pistons and such, but this is getting to a point where if it is a couple 100 more... I can't really do anything about it. At the end of this, I'll likely get all the bills together to tally a 'realistic' motor rebuild cost. I am in to it for quite a bit right now. I suppose a lot of my bill is other stuff like bushings, mounts, boots etc, so I will have to reduce it a bit.

So I guess I want input on a couple things, since I would like to get everything ordered early this week so hopefully I have this done before the end of february.

1. Bearings. Good enough to even bother to plastiguage?
2. Piston skirt scoring. Issue or not?

User avatar
MattWatson
Posts: 210
Joined: Mon Mar 14, 2011 11:48 am
Number of Saabs currently owned: 3
Location: Alberta, Canada

Re: 1985 SPG Rebuild Again

Postby MattWatson » Wed Jan 30, 2013 10:16 am

No feedback?

I guess tonight I will plastiguage the mains and double check the rod bearings. Seeing as EEURO is having a 10% off sale, it will pay for my shipping (they don't give the free shipping, or even a discount, if you order from Canadia) on a DI cartridge rings and potentially rod bearings. They don't seem to have mains, so I guess I need to find those somewhere else if I need to replace them.

I checked with my mechanic here and he said not to worry about the pistons.

I ordered a bore guage and some larger micrometers, so before I put everything back together I will double check taper and the like.

User avatar
Jordan
Site Admin
Posts: 4068
Joined: Fri Oct 13, 2006 2:38 pm
Number of Saabs currently owned: 6
Location: Vernon, CT
Contact:

Re: 1985 SPG Rebuild Again

Postby Jordan » Wed Jan 30, 2013 3:18 pm

I generally don't plasti-guage any SAAB stuff. The piston scoring isn't a big deal on a street motor. It's pretty common as long as the cylinder walls aren't chewed up.

Eeuro offers free international shipping for orders over $299. It used to be $150, but I guess they were getting lots of exhaust orders to Australia or something :lol:

User avatar
MattWatson
Posts: 210
Joined: Mon Mar 14, 2011 11:48 am
Number of Saabs currently owned: 3
Location: Alberta, Canada

Re: 1985 SPG Rebuild Again

Postby MattWatson » Wed Jan 30, 2013 8:20 pm

Jordan wrote:I generally don't plasti-guage any SAAB stuff. The piston scoring isn't a big deal on a street motor. It's pretty common as long as the cylinder walls aren't chewed up.


Excellent. Thats exactly waht I wanted to hear. :lol:

Jordan wrote:Eeuro offers free international shipping for orders over $299. It used to be $150, but I guess they were getting lots of exhaust orders to Australia or something :lol:


So THAT's why it changed! Apparently shipping is no longer free either. If I order off the website, it just gives me 10$ off after 300$. Maybe I need to phone in. At least with the 10% off, if they won't ship for free, it covers the cost of the shipping since I am getting a DIC, a couple gaskets that I guess I missed the first time around and rings and rod bearings.

User avatar
MattWatson
Posts: 210
Joined: Mon Mar 14, 2011 11:48 am
Number of Saabs currently owned: 3
Location: Alberta, Canada

Re: 1985 SPG Rebuild Again

Postby MattWatson » Wed Jan 30, 2013 9:13 pm

Before I had seen Jordan's note, I had already Plasti-Gauged the main's. According to the Bentley, you go a 1/4 in from the crank journal centerline. Pretty much puts you an 1/8 or so from the oiling hole.

Pretty much told me what I thought before. The mains are within spec, even the worst. However, the worst is close.

Allowable: .020-.062
#1 - .051
#2 - .038
#3 - .038
#4 - .051- (ie clearance was smaller, but there was no indicator between)
#5 - .051+

In case anyone hasn't done it before:

Put the bearing shells back in the block, and clean them with carb cleaner and make sure they are clean:
Image

Put the crank back in, and put plasti-gauge parrallel to the crank:
Image

Put the cap on, torque to spec (81 ft lbs):
Image

Remove. Check the resulting squish against the chart on the covering:
Image

So... I may replace the mains if I can find some somewhere, otherwise, these will probably be fine.

User avatar
Jordan
Site Admin
Posts: 4068
Joined: Fri Oct 13, 2006 2:38 pm
Number of Saabs currently owned: 6
Location: Vernon, CT
Contact:

Re: 1985 SPG Rebuild Again

Postby Jordan » Wed Jan 30, 2013 10:20 pm

rockauto has them

User avatar
MattWatson
Posts: 210
Joined: Mon Mar 14, 2011 11:48 am
Number of Saabs currently owned: 3
Location: Alberta, Canada

Re: 1985 SPG Rebuild Again

Postby MattWatson » Wed Jan 30, 2013 10:54 pm

Anyone ordered from parts for saabs? They have conrod bearings and mains, both cheaper than rockauto, eeuro and FCP.

Bonus too their shipping is cheap. 20$ to Canada. With shipping, Mains and Rod bearings are $100, a good 75$ cheaper than anywhere else.

kuponut
Posts: 56
Joined: Tue Dec 06, 2011 2:23 am
Nickname: kupo!
Number of Saabs currently owned: 3
Location: Seattle Area, WA

Re: 1985 SPG Rebuild Again

Postby kuponut » Thu Jan 31, 2013 12:49 am

Both Rockauto and TheSaabSite are showing the same main bearing sets and connecting rod bearing sets for all 4 cylinder engines for SAAB models from at least 1974 until 1999.

Jim ellis saab is showing different part numbers between the different engines though.

But if the bearings are all the same, eEuroparts has them listed for 1994-1999 900, 9000, 9-3, 9-5
http://www.eeuroparts.com/Parts/40630/M ... amNumber=2

But like I said, I don't know if they are indeed the correct bearings.

Parts for SAABs is showing different main bearing sets for pre-1994 and 1994 and up.

RobVonSAAB
Posts: 176
Joined: Fri Jul 22, 2011 11:26 pm
Nickname: Rob
Number of Saabs currently owned: 4

Re: 1985 SPG Rebuild Again

Postby RobVonSAAB » Thu Jan 31, 2013 3:05 am

I had to swap drivers just like you do on my spg, like everybody says you have to keep the shims for that trans with the new drivers and you need to swap them one at a time. Super important because the diff will drop and the trans will have to be taken apart if the diff falls down I believe. It helps to put grease on the shims to keep them from turning on you when installing the new drivers. The drivers are also marked "top" on them. Also take care not to drop the spring loaded ends out of the drivers while installing them into the trans...pack them with grease also to hold them where they need to be.

User avatar
MattWatson
Posts: 210
Joined: Mon Mar 14, 2011 11:48 am
Number of Saabs currently owned: 3
Location: Alberta, Canada

Re: 1985 SPG Rebuild Again

Postby MattWatson » Thu Jan 31, 2013 11:11 am

kuponut wrote:Both Rockauto and TheSaabSite are showing the same main bearing sets and connecting rod bearing sets for all 4 cylinder engines for SAAB models from at least 1974 until 1999.

Jim ellis saab is showing different part numbers between the different engines though.

But if the bearings are all the same, eEuroparts has them listed for 1994-1999 900, 9000, 9-3, 9-5
http://www.eeuroparts.com/Parts/40630/M ... amNumber=2

But like I said, I don't know if they are indeed the correct bearings.

Parts for SAABs is showing different main bearing sets for pre-1994 and 1994 and up.


I thought that rod bearings were the same all the way, but cranks were different starting in 94, so I Just ordered from Parts for Saabs this morning when I got to work. Ended up getting the rod bearings from them as well at the same time.

Interestingly enough, I ordered a couple things from eeuro yesterday as well, so we will have a race to see who gets here first. Parts for Saabs was 20$ cheaper shipping, and I already have a confirmation that they have air mailed the package, so I assume I will get it first since I live in a major city with an airport. We will see though.

User avatar
DrewP
Posts: 2084
Joined: Wed Dec 26, 2007 8:27 pm
Nickname: TANK
Number of Saabs currently owned: 1
Location: Monrovia, CA

Re: 1985 SPG Rebuild Again

Postby DrewP » Thu Jan 31, 2013 11:41 am

I believe the bearings are all the same. On the Glyco boxes we had at the shop the rod and main bearings were marked SAAB 4-CYL 73-02 or something like that.

Jordan is right on about the pistons. I'd re-use them. New rings if you really want to hone the bores but that's all I'd do along with timing chain guides and bottom end bearings and crank and oil pump seals.
"You can educate ignorance, but you can't fix stupid."

User avatar
MattWatson
Posts: 210
Joined: Mon Mar 14, 2011 11:48 am
Number of Saabs currently owned: 3
Location: Alberta, Canada

Re: 1985 SPG Rebuild Again

Postby MattWatson » Thu Feb 21, 2013 8:47 pm

I have been busy both with work and with the rebuild and have made (to me) significant progress. I got the block and everything cleaned up.

The pistons were absolutely terrible, and the oil control rings were completely glued to the pistons, and all the oil drain holes were completely plugged. I spent many hours trying to clean the damn things with a brush and a combination of aluminum cleaner (acid wheel cleaner) and or soap and or broken piston rings. This didn't work well at all. I also tried some of the 'miracle' treatments like seafoam, combustion chamber cleaner etc. None of it did much at all. Really a waste of money.

So I was at princess auto picking up some general shop supplies (think a crappy canadian version of harbor freight) and bought a bag of walnut shells and glass beads.

I did 1 piston in about 2 hours with the brush and soap (which worked the best) and did the other three in 5 minutes of blasting with the walnut shells. It also was the only way to clean up the inside of the piston which was completely impossible any other way.

Image
Image
Image
Image
Image

As a side question: Does anyone know what you are supposed to do if one of the wrist pin bushings are out of spec? Out of curiousity I went looking, and I could find pins and everything else, but not the busings.


Return to “Projects and Build Threads”

Who is online

Users browsing this forum: No registered users and 9 guests