1985 SPG Rebuild Again

A place for long term threads surrounding a specific project or SAAB build for motorsports or restoration
User avatar
MattWatson
Posts: 210
Joined: Mon Mar 14, 2011 11:48 am
Number of Saabs currently owned: 3
Location: Alberta, Canada

Re: 1985 SPG Rebuild Again

Postby MattWatson » Thu Feb 21, 2013 9:15 pm

I also finished cleaning up the block. Two cans of oven cleaner later (it does an AMAZING job) I got all of the crud and crap cleaned off the engine and out of the engine.

Then it got hit with wire brushes to get everything off it.

I had some leftover Epoxy Primer, Viper blue basecoat and topcoat, and was going to do all three on it, but after just the grey epoxy it looked great, so I just left it at that. Since it is not going to be exposed to UV light, it should be fine.

Image
Image
Image
Image

I ended up buying a hone since for the 50$ shipped was half of the 100$ a couple of the shops wanted to hone it. Mounted it up on a single speed low speed drill that I have for mixing pails of thinset.

I ended up smootly running it up and down at a fast clip for about 5 seconds per, and it gave it a pretty good hatch. It is a little less than 45 degrees, but it is pretty close. I would need to go up and down a bit faster for it to be 45, or slow down the drill.

I used copious amounts of ATF for lubrication, which seemed to work pretty well.

Image
Image

It then got a soap and water bath and then copious rinsing with hot water and then blown out

Image
Image
Image
Last edited by MattWatson on Wed Feb 27, 2013 9:08 am, edited 1 time in total.

gmreider
Posts: 326
Joined: Fri Jul 13, 2012 8:28 am
Number of Saabs currently owned: 6
Location: Boyertown PA

Re: 1985 SPG Rebuild Again

Postby gmreider » Fri Feb 22, 2013 8:48 am

you'll be happy you left the block gray. Light colors make seeing any leaks so much easier. Light colored engine compartments are good also.

User avatar
MattWatson
Posts: 210
Joined: Mon Mar 14, 2011 11:48 am
Number of Saabs currently owned: 3
Location: Alberta, Canada

Re: 1985 SPG Rebuild Again

Postby MattWatson » Fri Feb 22, 2013 9:45 am

gmreider wrote:you'll be happy you left the block gray. Light colors make seeing any leaks so much easier. Light colored engine compartments are good also.


Everyone keeps saying that to me haha. I just am not sold on the fact that I *want* to see any leaks after this is done :lol:

I am still debating pulling everything out of the engine bay and painting it white a la the rally cars here. there is a bit of rust forming, and a black engine bay swallows up light.

User avatar
DrewP
Posts: 2084
Joined: Wed Dec 26, 2007 8:27 pm
Nickname: TANK
Number of Saabs currently owned: 1
Location: Monrovia, CA

Re: 1985 SPG Rebuild Again

Postby DrewP » Fri Feb 22, 2013 11:26 am

Do itttt....

Don't feel too bad if it leaks. My Lesco built engine in my '85 only made it about a year before it started dripping. The engine and seals are old designs, even if you're super careful with everything they're bound to weep a little fluid.
"You can educate ignorance, but you can't fix stupid."

User avatar
Crazyswede
Team Turbo Troll Crew
Posts: 4540
Joined: Fri Sep 22, 2006 3:53 pm
Nickname: Mongo
Number of Saabs currently owned: 97
Location: Vermont
Contact:

Re: 1985 SPG Rebuild Again

Postby Crazyswede » Fri Feb 22, 2013 12:21 pm

looks great. I have some grey POR15 I was thinking of painting a block with.
I am the 73%

User avatar
Geoff
Team Turbo Troll Crew
Posts: 3890
Joined: Fri Oct 20, 2006 3:31 pm
Nickname: Geoff
Number of Saabs currently owned: 6
Location: Nude Humpshire

Re: 1985 SPG Rebuild Again

Postby Geoff » Fri Feb 22, 2013 1:20 pm

Use Loctite 518 on both sides of each gasket to help minimize leaks.

Oven cleaner also works great inside the oil supply and return lines to de-coke them. I bought some Permatex Gasket Remover (a chemical spray that loosens gaskets and does wonders at removing Loctite 518). I'm pretty sure it's the same stuff as oven cleaner - smells the same, burns the same if you get a spot on your hand.
The kind of dirty that doesn't wash off :eyebrows:

RobVonSAAB
Posts: 176
Joined: Fri Jul 22, 2011 11:26 pm
Nickname: Rob
Number of Saabs currently owned: 4

Re: 1985 SPG Rebuild Again

Postby RobVonSAAB » Tue Feb 26, 2013 8:39 pm

I'll have to try that oven cleaner, diesel and a parts brush works well also, for heavy grease and grime.

User avatar
MattWatson
Posts: 210
Joined: Mon Mar 14, 2011 11:48 am
Number of Saabs currently owned: 3
Location: Alberta, Canada

Re: 1985 SPG Rebuild Again

Postby MattWatson » Sat Mar 02, 2013 9:00 pm

Havn't had much time to work given a lot of off hours work needed for my job, but I did a bit during the week and then quite a bit today. The bottom end is together minus the back plate and oil pump housing. That will be tomrrows Job.

I also spent quite a bit of time cleaning up and rebuilding the turbo. Once it was out, there was lots of play. Got it apart and cleaned up and put back together. Walnut shell for anything that sees oil (have heard horror stories about glass beads in these situations) and glass bead for anything else cast.

I got my kit from g-pop, seemed pretty good, they even sent a better compressor seal than the rubber o-ring which is nice.

All cleaned up:
Image

And.. together. There are tons of good guides, and this was simple simple.
Image

Image

Unfortunately, I have a fairly significantly cracked turbine housing:
Image
Image

I pulled apart a spare I had, and it is still cracked, but looks 100% better. I considered getting a new one, but I think I'll just use this since I am not pushing crazy boost through this car or anything.
Image
Image

I'll also finish blasting the exhaust manifold and get everything back together tomorrow.

User avatar
MattWatson
Posts: 210
Joined: Mon Mar 14, 2011 11:48 am
Number of Saabs currently owned: 3
Location: Alberta, Canada

Re: 1985 SPG Rebuild Again

Postby MattWatson » Fri Apr 05, 2013 9:35 pm

So I am slow at updates. I took lots of pictures... Here is the head being done, all valves lapped and reinstalled.

I made an adapter out of a chrome deep 7/8 socket cut down in order to put the valve keepers back in. A bit of assembly lube on the keeper and a magnetized screwdriver made it a pretty quick process.

Image
Image
Image
Image
Image
Image

User avatar
MattWatson
Posts: 210
Joined: Mon Mar 14, 2011 11:48 am
Number of Saabs currently owned: 3
Location: Alberta, Canada

Re: 1985 SPG Rebuild Again

Postby MattWatson » Fri Apr 05, 2013 9:45 pm

And the engine is finally back together. This is a couple weeks old, so the engine is now back in the car, and almost everything back together. Just need to find the damn 5mm allan bolts to screw in the slave cylinder and then add coolant and such.

Image

Seals seals everywhere!
Image
Image
Image

Image
Image
Image
Image
Image
Image
Image
Image
Image

Image
Image

Mounted on the transmission:
Image
Image
Image

User avatar
Jordan
Site Admin
Posts: 4068
Joined: Fri Oct 13, 2006 2:38 pm
Number of Saabs currently owned: 6
Location: Vernon, CT
Contact:

Re: 1985 SPG Rebuild Again

Postby Jordan » Sat Apr 06, 2013 6:47 am

Screw the allen bolts. Standard hex head are much easier to install/ remove

User avatar
MattWatson
Posts: 210
Joined: Mon Mar 14, 2011 11:48 am
Number of Saabs currently owned: 3
Location: Alberta, Canada

Re: 1985 SPG Rebuild Again

Postby MattWatson » Sat Apr 06, 2013 7:32 pm

Yah, I ended up finding them. In the other transmission that I took out. Duh.

Everything is 100% back together and in the car, but it has no spark. Didn't even get a chance to troubleshoot it, so that will be tomorrows job.

Soooo close.

User avatar
MattWatson
Posts: 210
Joined: Mon Mar 14, 2011 11:48 am
Number of Saabs currently owned: 3
Location: Alberta, Canada

Re: 1985 SPG Rebuild Again

Postby MattWatson » Sun Apr 07, 2013 8:35 pm

:woohoo: IT RUNS! :woohoo:

Soo... Apparently I plugged the wrong connector into the coil :rolleyes:, which got me my spark back. Even so, it would start, but run really really crappy. Had my mechanic friend look at it, and he said it sounded like it was 1 tooth off on the timing chain, which wasn't possible, unless they marked the chain wrong.

We ened up figuring out that the Bentley manual was wrong on the plug wire locations (I paid no attention to any of the coil wiring and distributor wiring when I took it appart, since the plan was to T5 it all along.) So once we figured it out, the car started and ran great!

One lifter took a bit to pump up properly, but then it was fine too. I think I have a couple coolant leaks here and there (very slight) and need to tighten up a couple bolts, but then it is all good.

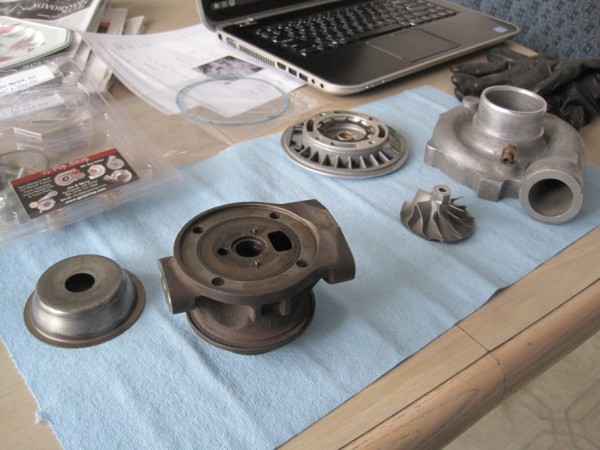
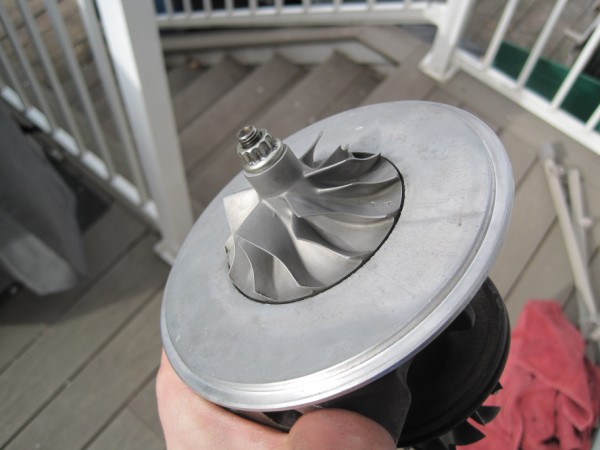
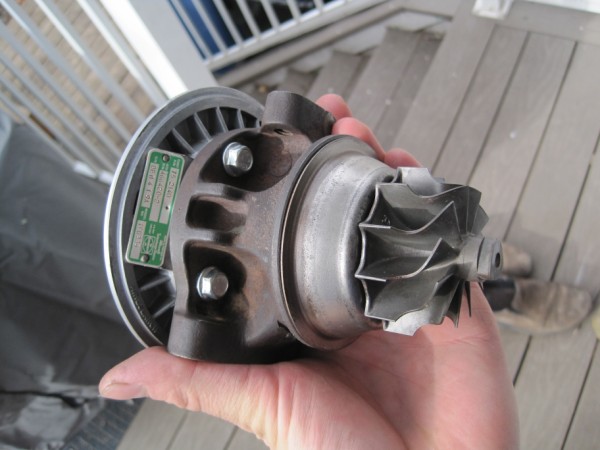
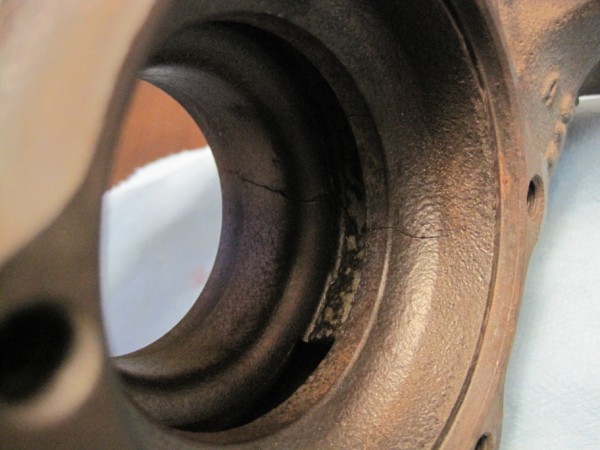
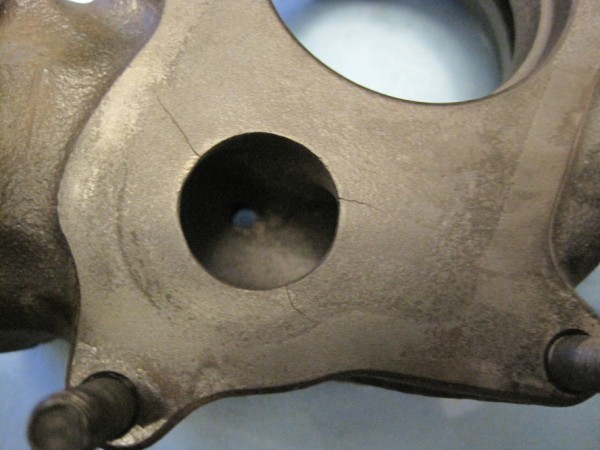
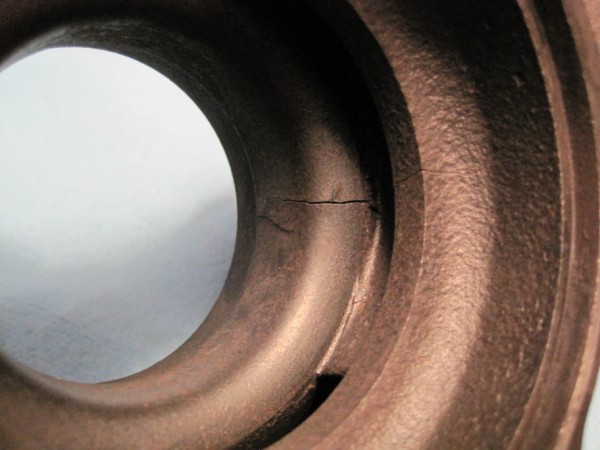
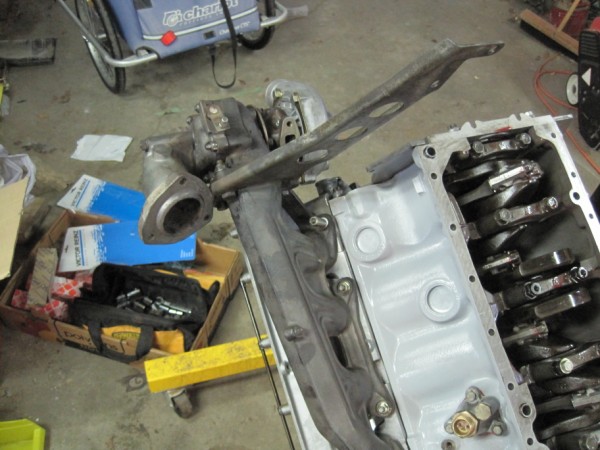
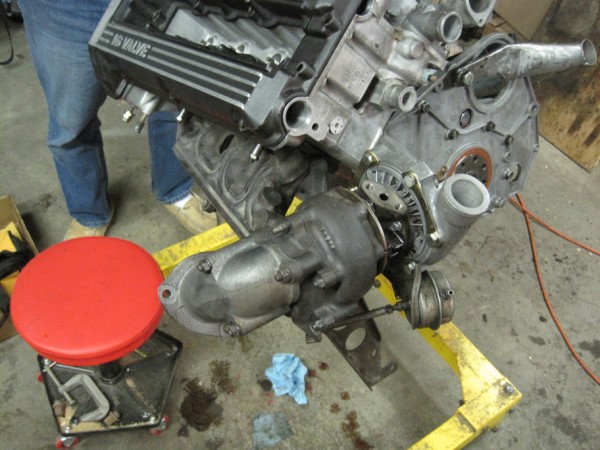
The only issue currently is there is a tiny bit of interfearance on turbine housing with the turbine when it is cold (I swapped to a "less cracked" housing), so I am hoping that that will eventually go away once it has worn in a bit. It completely goes away once the housing is fully heated and expands a bit. I guess if it grenades itself, I get to buy a new/rebuilt turbo. But for now I get the cool turbo whine that everyone seems to love, even though usually it means that your turbo is about to die due to bearings haha.

Once I get one of the drive shaft boots on the axles tightened down (I didn't have the right pliers at the shop, and had to swap to a spare set of axles since when I was putting the engine in, one of the inner tripods lost one of the bearings in the protective bag i put on, and I now have 10 million of those damn needles to put back together, if I can) and get front wheels on it, it is 100% good to go for a drive and break-in. :yay:

When I T5 it, I am going to re-wire the entire engine bay, because the wiring in it is a HUGE mess. it works, and is reliable, but be damned if you can trace anything anywhere. I think a milspec connector or a few bulkhead weatherpak connectors will do the trick for ease of removal. I also can't understand why the main wire bundle is so huge when it maybe has 10 wires in it. So I will likely streamline the whole harness (esp. with T5) and build 2 of them at the same time, so that I have one for the future rally car when I start it this summer after funds are build up again.

Chouan
Posts: 203
Joined: Thu Oct 18, 2012 6:54 pm
Number of Saabs currently owned: 2

Re: 1985 SPG Rebuild Again

Postby Chouan » Mon Apr 08, 2013 8:19 pm

I'll be interested to see that harness, I have the same goal :-)

User avatar
MattWatson
Posts: 210
Joined: Mon Mar 14, 2011 11:48 am
Number of Saabs currently owned: 3
Location: Alberta, Canada

Re: 1985 SPG Rebuild Again

Postby MattWatson » Wed Apr 10, 2013 10:51 am

Got it on wheels yesterday, started it up and took it for a quick run.

First impression, it is quite a bit quicker than before. Boosts well and runs amazingly. All the idle problems have gone away.

Have a few things to sort out: getting a pin for the transmission shift linkage (mine is broken, so I hose-clamped it on), and I think I am going to get a new exhaust housing for the turbo... it whines way to much.

All in all, I don't think I'll rebuild an engine for a daily driver again... I will rebuild a spare, then swap. The rebuild was enjoyable, the stress of not having it going for a couple months and the rush of trying to get it done quickly wasnt so fun.


Return to “Projects and Build Threads”

Who is online

Users browsing this forum: No registered users and 8 guests