I have done a handful of beginning TIG with dozens of students. I've always had them start with aluminum. First key is being comfortable and being able to see the bead. A table and chair are a must. If you are standing and using a foot amp controller you don't stand a chance as a beginner.
I start folks off by just running beads and not adding filler rod. Study the bead width, penetration, ripples ect and correlate with your speed, torch angle, amps and arc length. Do this without any rod. Just hold the filler rod to get use to it.
93' Road Racer Build
-
squaab99t

- Posts: 1273
- Joined: Wed Mar 28, 2007 5:43 pm
- Number of Saabs currently owned: 4
- Location: Shoreline Wa
Re: 93' Road Racer Build
Last edited by squaab99t on Mon May 18, 2015 12:41 pm, edited 1 time in total.
-
jdwertz
- Posts: 181
- Joined: Fri Jul 16, 2010 9:20 am
- Number of Saabs currently owned: 1
- Location: Bay Area, CA
Re: 93' Road Racer Build
Does anyone have thoughts on header and downpipe wrapping? I have heard mixed things about doing this. I won't be spending the money for ceramic coating.
-
RadioFlyer

- Posts: 918
- Joined: Wed Oct 05, 2011 11:08 am
- Nickname: RadioFlyer
- Number of Saabs currently owned: 7
- Location: Utah
Re: 93' Road Racer Build
I wrapped the manifold, external wastegate, and dp on my '80T last summer. It ended up glowing hot and fried a couple of gaskets. Then with the direct exhaust coming through the holes in the gaskets, the heat wrap dried out and disintegrated. Not sure if it would happen like that on a 16v, but this was just daily driving - no racing or crazy boost. Even interstate cruising got it red hot. For the next round of heat protection, I'm just going to go with metal shielding to block the intercooler and battery from radiant heat rather than wrapping.
-
SwedeSport

- Posts: 3021
- Joined: Mon Jun 15, 2009 9:52 am
- Number of Saabs currently owned: 5
- Location: Pottstown, PA
- Contact:
Re: 93' Road Racer Build
DO NOT WRAP A STREET CAR EXHAUST.
The moisture and water gets trapped and aaccelerates the rust out on a header...
If it's a race car that will not get wet... go ahead and wrap it.
The moisture and water gets trapped and aaccelerates the rust out on a header...
If it's a race car that will not get wet... go ahead and wrap it.
Swedesport Motors, Apparel and Accessories for SAAB Junkies.
Http://Facebook.com/swedesportmotors
Swedesportmotors@gmail.com
Http://Facebook.com/swedesportmotors
Swedesportmotors@gmail.com
-
jdwertz
- Posts: 181
- Joined: Fri Jul 16, 2010 9:20 am
- Number of Saabs currently owned: 1
- Location: Bay Area, CA
Re: 93' Road Racer Build
SwedeSport wrote:DO NOT WRAP A STREET CAR EXHAUST.
The moisture and water gets trapped and aaccelerates the rust out on a header...
If it's a race car that will not get wet... go ahead and wrap it.
Roger that, will be driven on the street and probably in the rain occasionally.
-
SwedeSport
- Posts: 3021
- Joined: Mon Jun 15, 2009 9:52 am
- Number of Saabs currently owned: 5
- Location: Pottstown, PA
- Contact:
Re: 93' Road Racer Build
I wrapped one and it rotted completely through in less than 2 years.
Swedesport Motors, Apparel and Accessories for SAAB Junkies.
Http://Facebook.com/swedesportmotors
Swedesportmotors@gmail.com
Http://Facebook.com/swedesportmotors
Swedesportmotors@gmail.com
-
jdwertz
- Posts: 181
- Joined: Fri Jul 16, 2010 9:20 am
- Number of Saabs currently owned: 1
- Location: Bay Area, CA
Re: 93' Road Racer Build
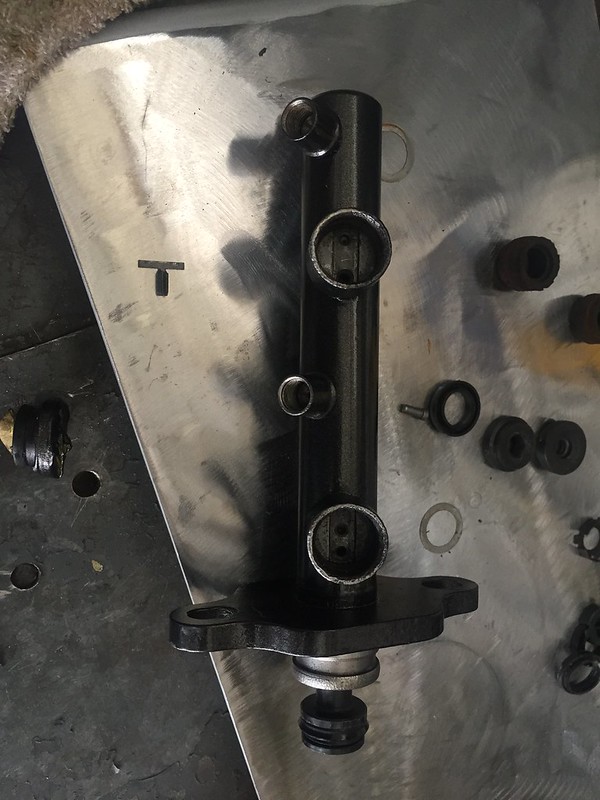
Rebuilding my brake master cylinder. Can't remember which hold the stop pin goes in because I failed to take a disassembly picture. There are two reservoir ports with two holes in each port. Counting from the bottom of the picture starting with #1, I believe the pin should go in the third hole of the second port(closest to the top of the picture) can anyone confirm?
-
gmreider
- Posts: 326
- Joined: Fri Jul 13, 2012 8:28 am
- Number of Saabs currently owned: 6
- Location: Boyertown PA
Re: 93' Road Racer Build
That's correct. If you look closely, I think you will find that the T pin will only fit in that hole.
-
jdwertz
- Posts: 181
- Joined: Fri Jul 16, 2010 9:20 am
- Number of Saabs currently owned: 1
- Location: Bay Area, CA
Re: 93' Road Racer Build
gmreider wrote:That's correct. If you look closely, I think you will find that the T pin will only fit in that hole.
Thank you kindly sir.
-
jdwertz
- Posts: 181
- Joined: Fri Jul 16, 2010 9:20 am
- Number of Saabs currently owned: 1
- Location: Bay Area, CA
Re: 93' Road Racer Build
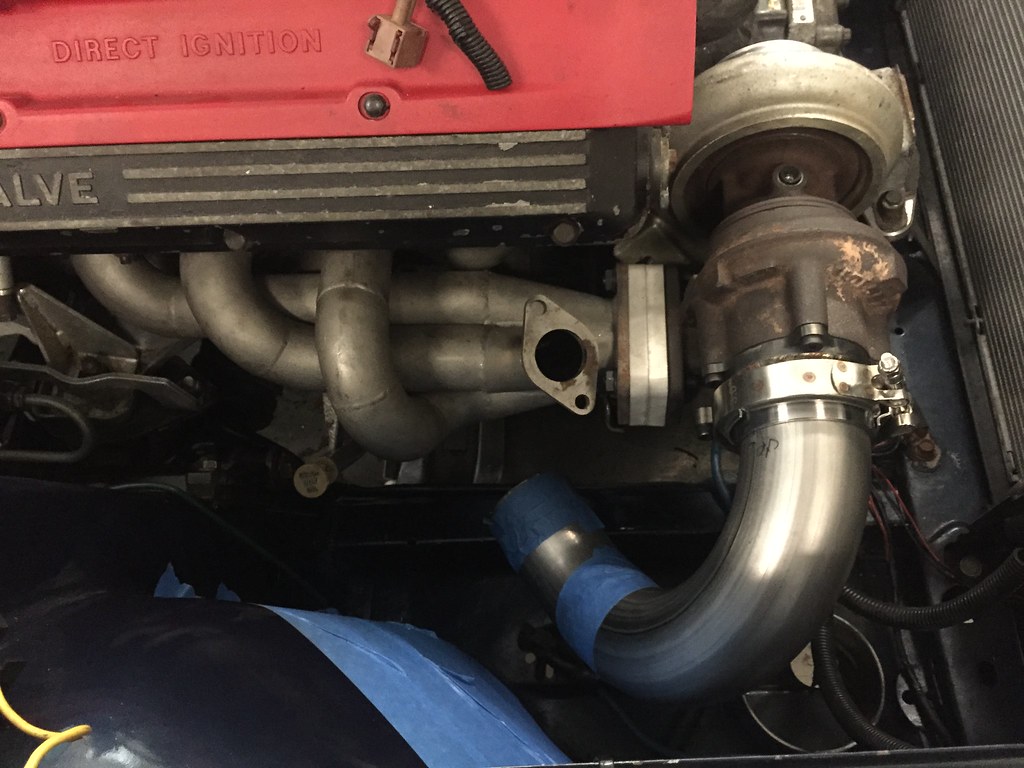
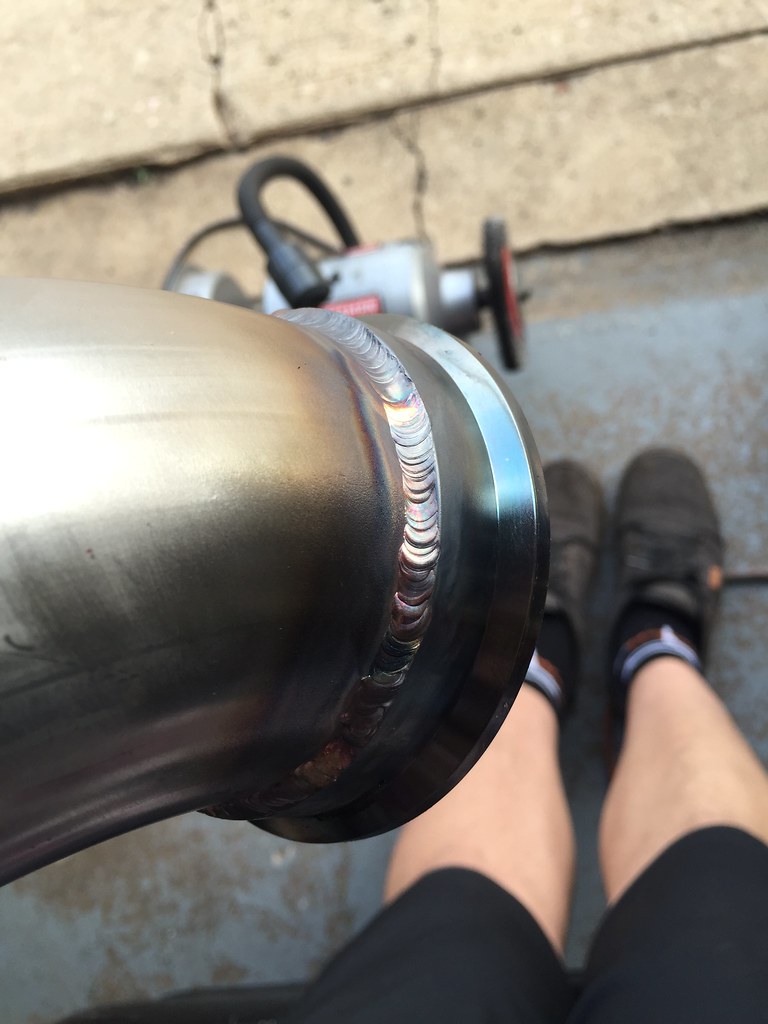
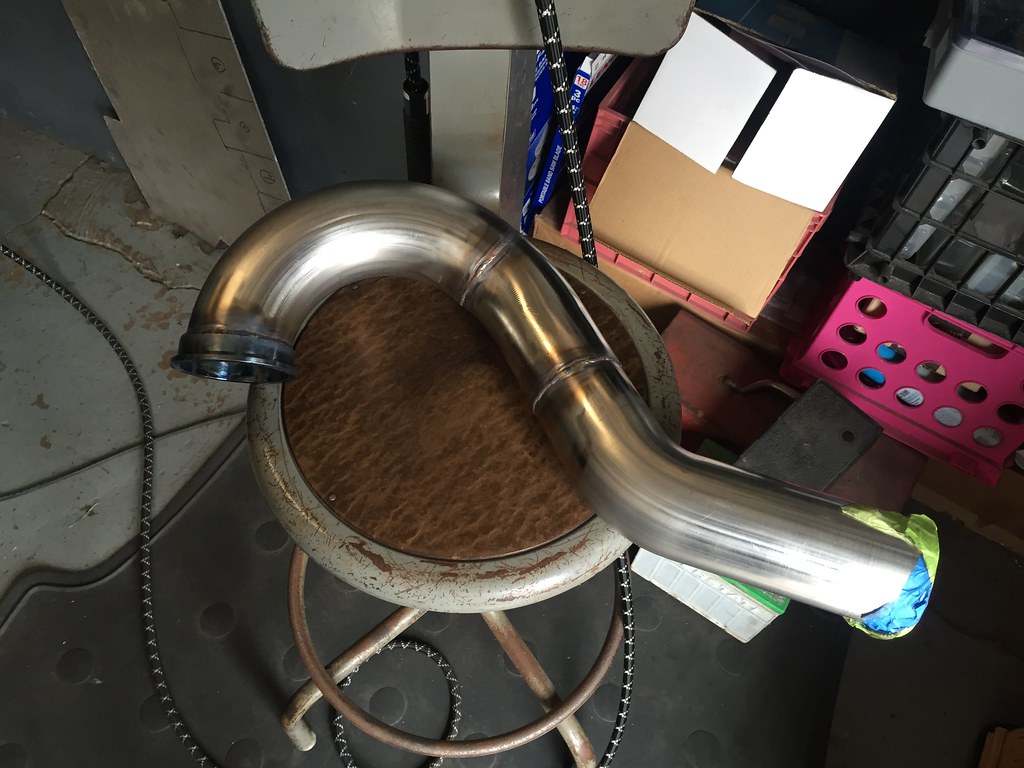
Finally started making some progress this weekend on the exhaust. I am pretty happy with how the downpipe turned out. Thanks to Dennis and Drew for answering all my questions and putting up with my constant buggering.
Mocking up the downpipe
Tacked
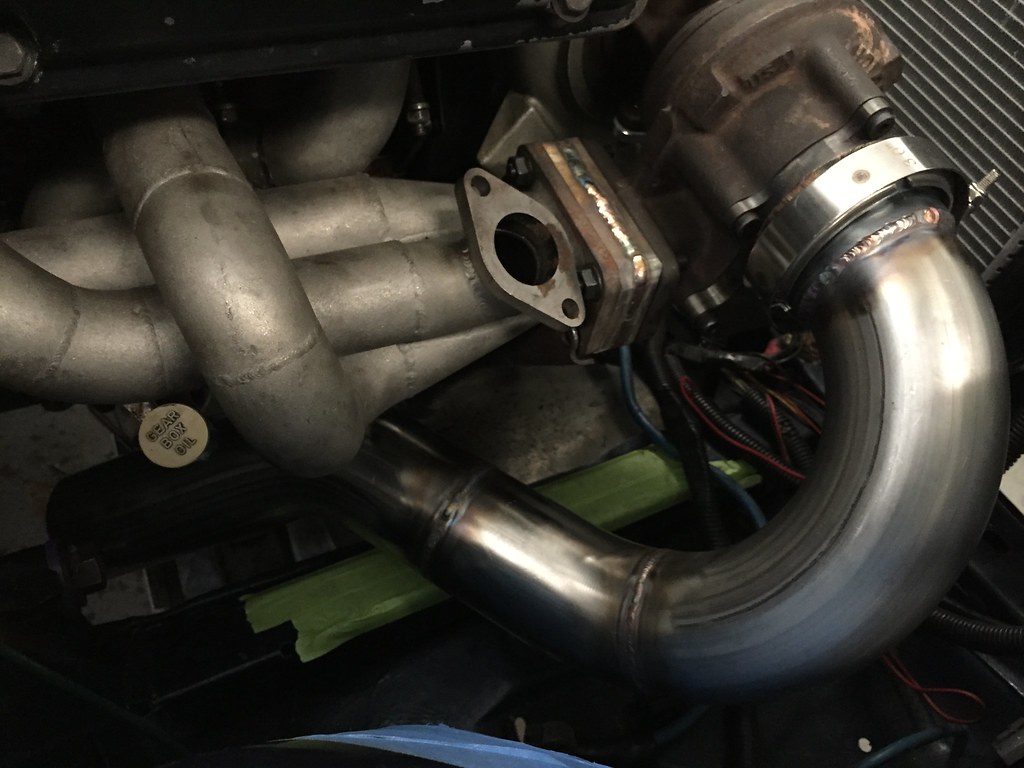
Checking for final fit after tacking

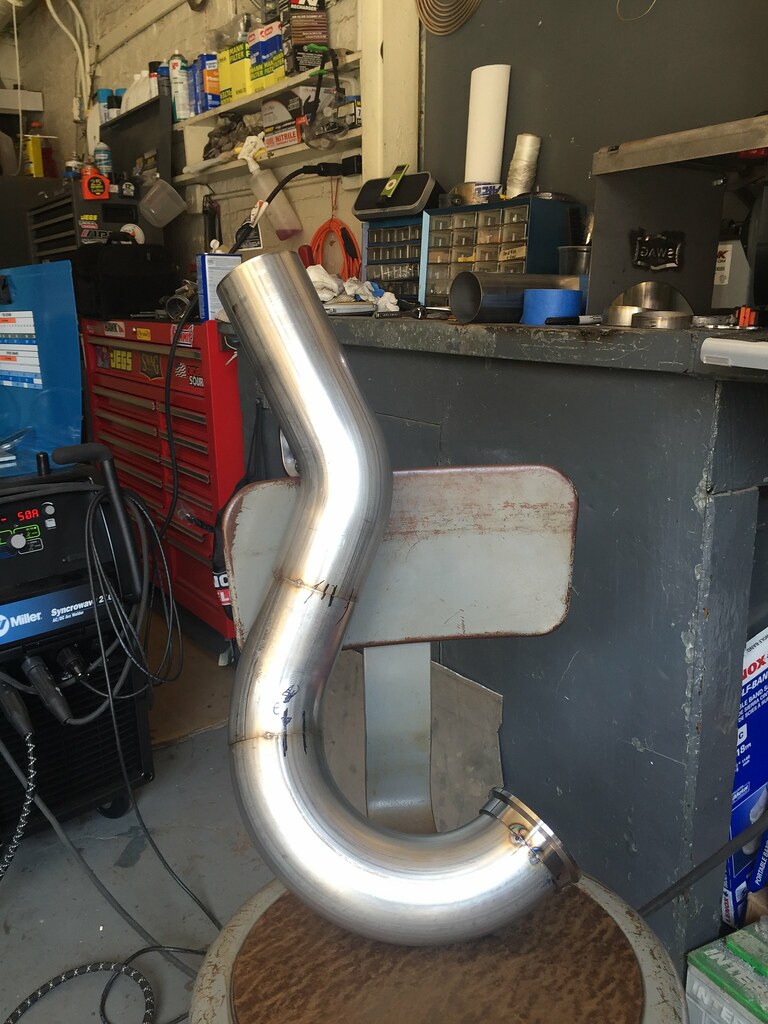
Welded together
One of the better beads
Final Piece
Mocking up the downpipe
Tacked
Checking for final fit after tacking
Welded together
One of the better beads
Final Piece
-
squaab99t
- Posts: 1273
- Joined: Wed Mar 28, 2007 5:43 pm
- Number of Saabs currently owned: 4
- Location: Shoreline Wa
Re: 93' Road Racer Build
Glad to help. Learning a skill is a constant question. You should never stop asking.
Nice fit up on the joints. From your pictures it looks like it is not cheated and no gaps post tack. How did you like the back purge?
Nice fit up on the joints. From your pictures it looks like it is not cheated and no gaps post tack. How did you like the back purge?
-
jdwertz
- Posts: 181
- Joined: Fri Jul 16, 2010 9:20 am
- Number of Saabs currently owned: 1
- Location: Bay Area, CA
Re: 93' Road Racer Build
squaab99t wrote:Glad to help. Learning a skill is a constant question. You should never stop asking.
Nice fit up on the joints. From your pictures it looks like it is not cheated and no gaps post tack. How did you like the back purge?
I spent a lot of time on the fitment. I read all the Burns articles and followed their guidelines to a T. I used a hose clamp to mark the lines for my cuts as to rid of any cheater cuts.
Back purging made welding each joint a little more difficult because it limited positioning of the downpipe. However I did get excellent results on the inside OD of the pipe with better penetration.
Re: 93' Road Racer Build
This needs an update...
-
jdwertz
- Posts: 181
- Joined: Fri Jul 16, 2010 9:20 am
- Number of Saabs currently owned: 1
- Location: Bay Area, CA
Re: 93' Road Racer Build
Unfortunately life has been getting in the way. I moved across the country a few months ago.
I decided to bite the bullet and had it shipped to California. It should be here this week.
I decided to bite the bullet and had it shipped to California. It should be here this week.
-
Crazyswede

- Team Turbo Troll Crew
- Posts: 4540
- Joined: Fri Sep 22, 2006 3:53 pm
- Nickname: Mongo
- Number of Saabs currently owned: 97
- Location: Vermont
- Contact:
Re: 93' Road Racer Build
that down pipe probably offers more performance than the header
I am the 73%
Return to “Projects and Build Threads”
Who is online
Users browsing this forum: No registered users and 3 guests