How To - Projector Retrofit E-codes!

A place for long term threads surrounding a specific project or SAAB build for motorsports or restoration
Cark
Posts: 168
Joined: Sat Jul 16, 2011 9:02 am
Number of Saabs currently owned: 2

How To - Projector Retrofit E-codes!

Postby Cark » Thu May 15, 2014 9:41 am

Hey guys, I don't post here much, but love to lurk and and enjoy all the engineering geekery that goes on here!

I recently undertook a project that I thought some of you may appreciate, and be able to use or even improve upon yourselves.

Sorry if you've already seen it in one of the other forums, I know there are some of you that really only hang out here.

-

OK, here goes the "how to projector retrofit e-codes"

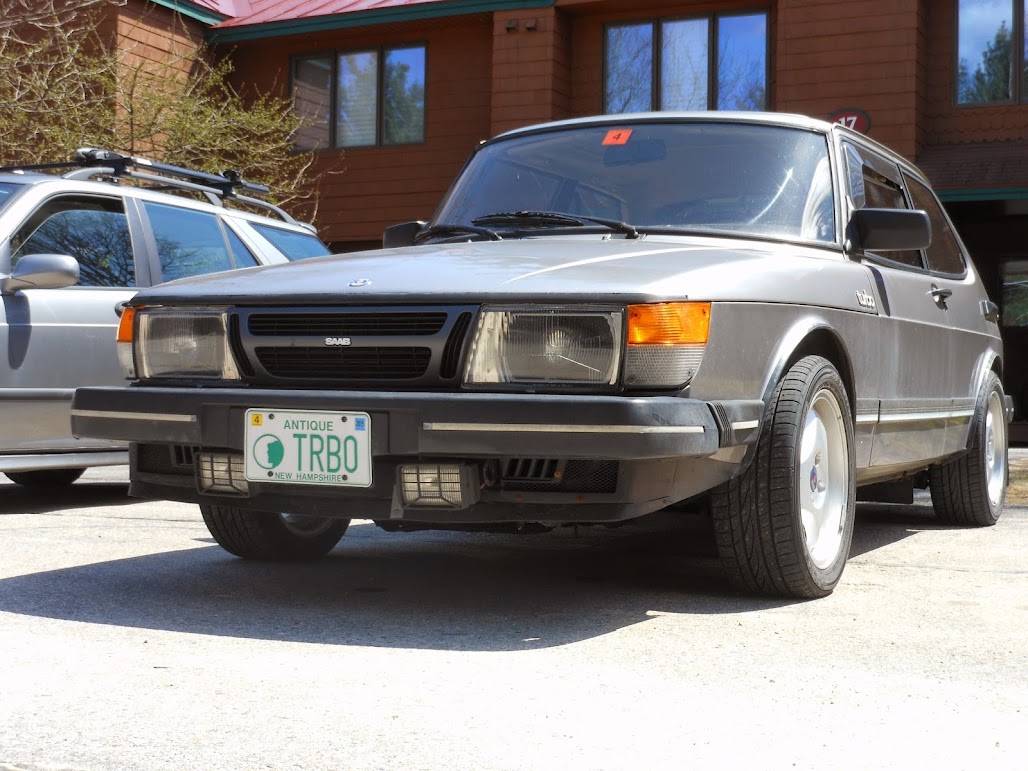
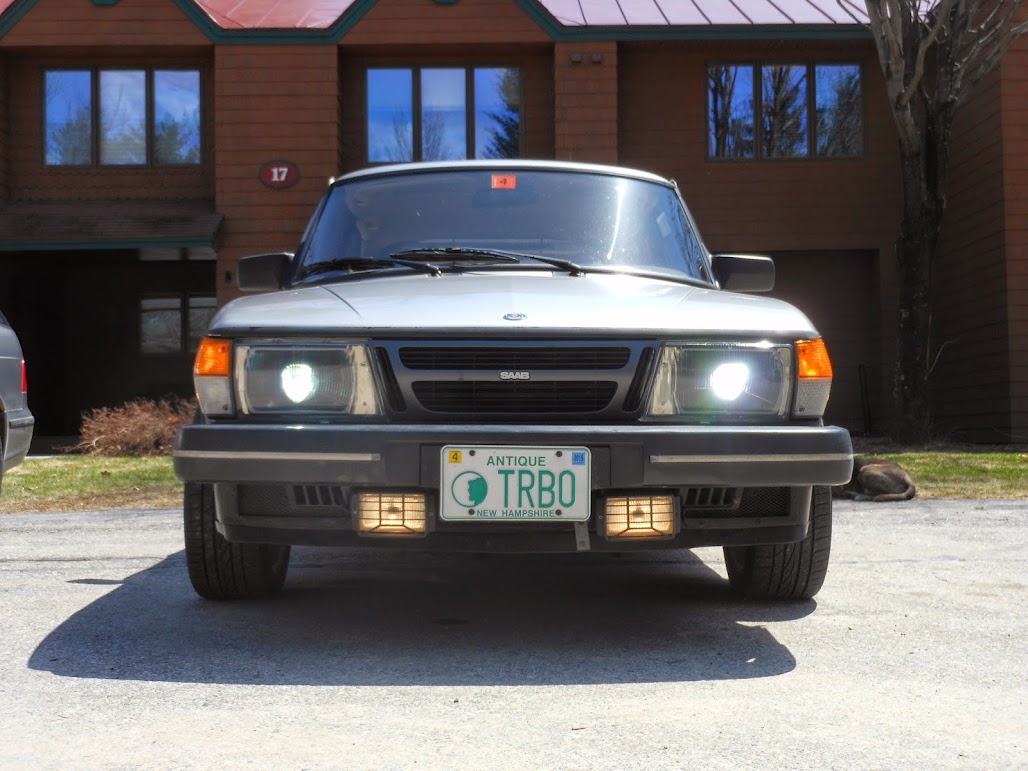
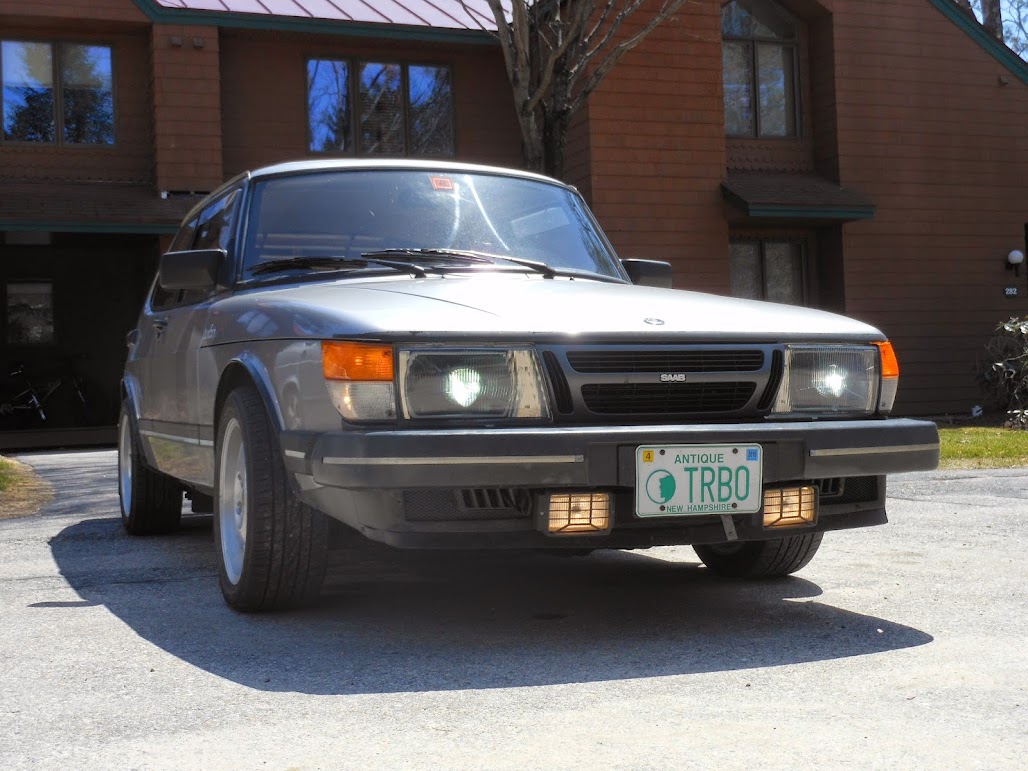
I did this because my 85 came with factory e-codes, but being 30 years old, the reflectors had lost all of there "reflectability" and having them recoated seemed like an expensive proposition. So I thought projectors would be a cool way to upgrade and modernize!

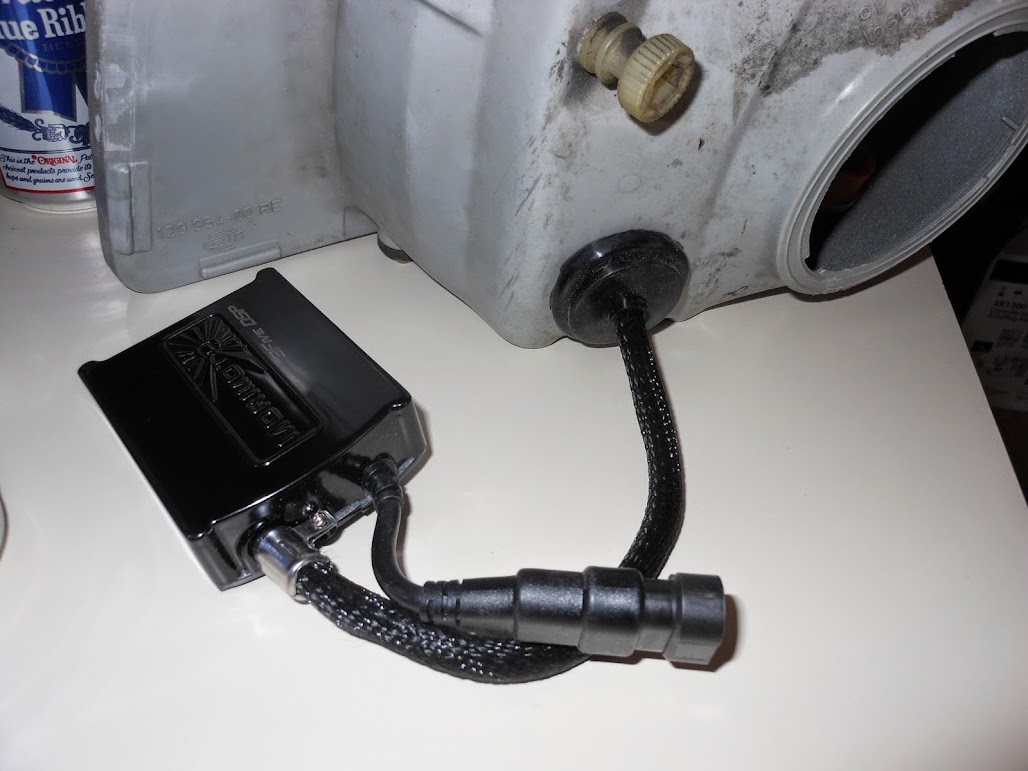
The kit I used is this one:
http://www.theretrofitsource.com/complete-retrofit-kits/bi-xenon-mini-stage-3-kit-d2s.html#.U3TFcF5hz4I
I went with the basic options and 4300K bulbs. They are a nice clean white, not too blue or anything. They give the car a modern look without being over the top

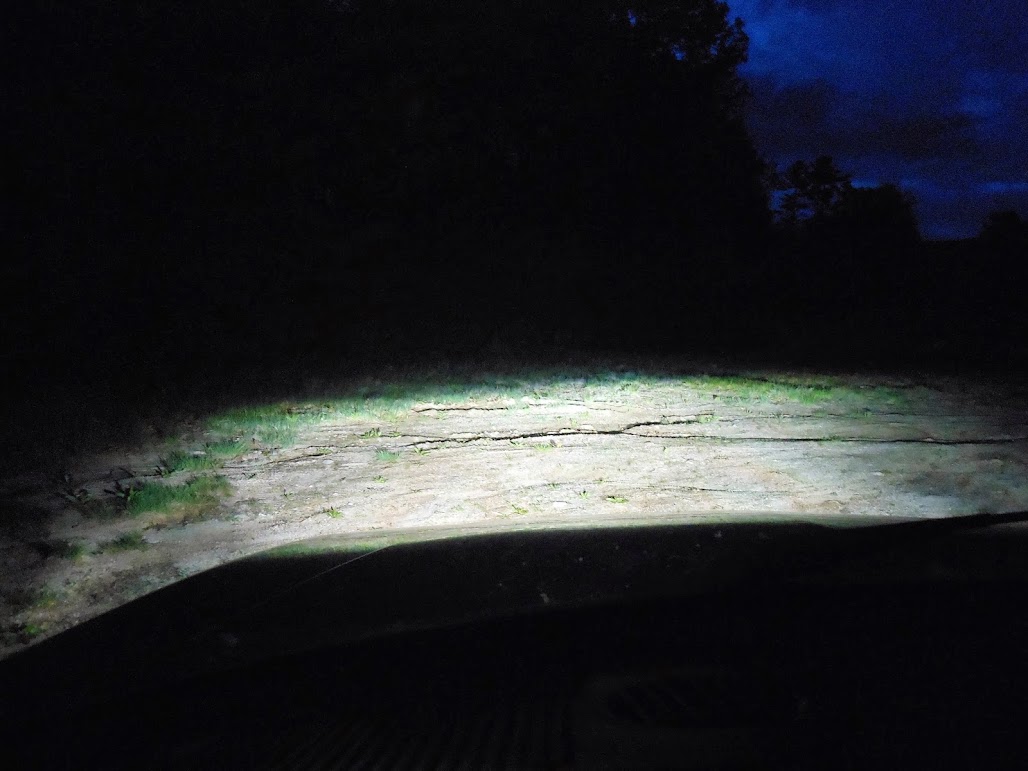
I got my kit while they were running a 25% off promo, so the price was much easier to swallow. They are not cheap, but I've always said you can't put a price on driver safety, and being able to see at night is hugely important to me!

I will also say that the kit comes with basically NO instructions whatsoever. Pretty much everything is online on their site, and there are lots of videos for the kits on youtube. It's a bit annoying having to go back and forth to the computer all the time, but I guess it saves on waste (always a good thing!).

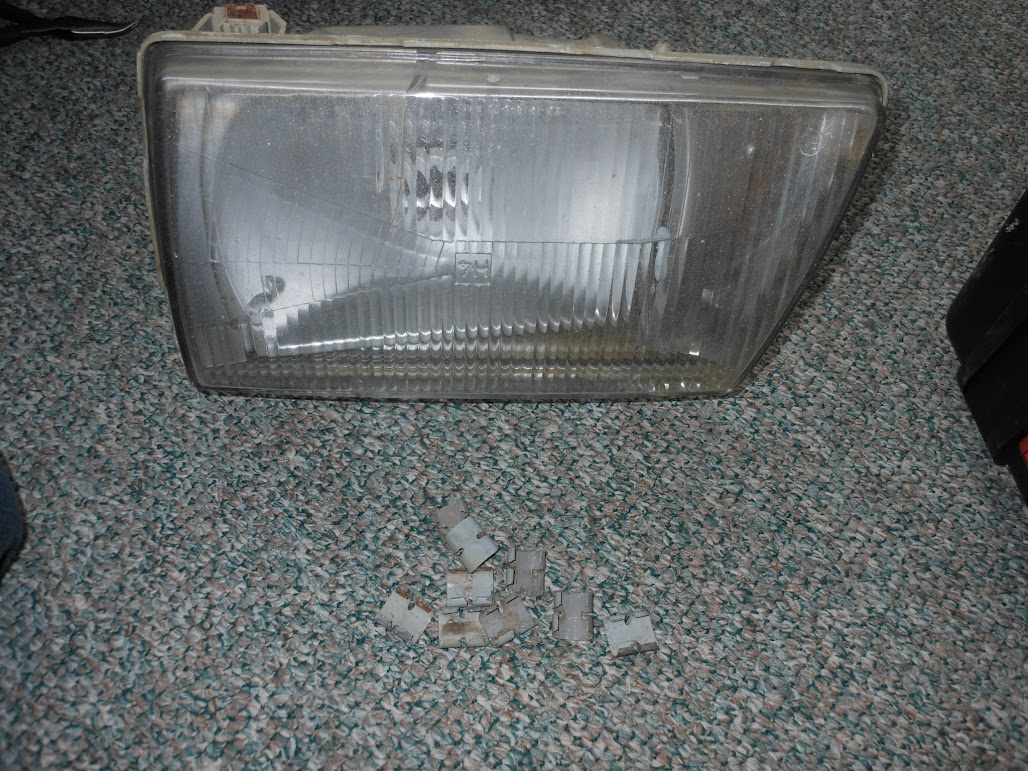
This is how I did it on a set of flat nose (86 and earlier) e-codes. It would not work this way for the standard sealed beams, it may be the same for later slant nose e-codes, I'm not sure though.

-Remove headlights from car, duh
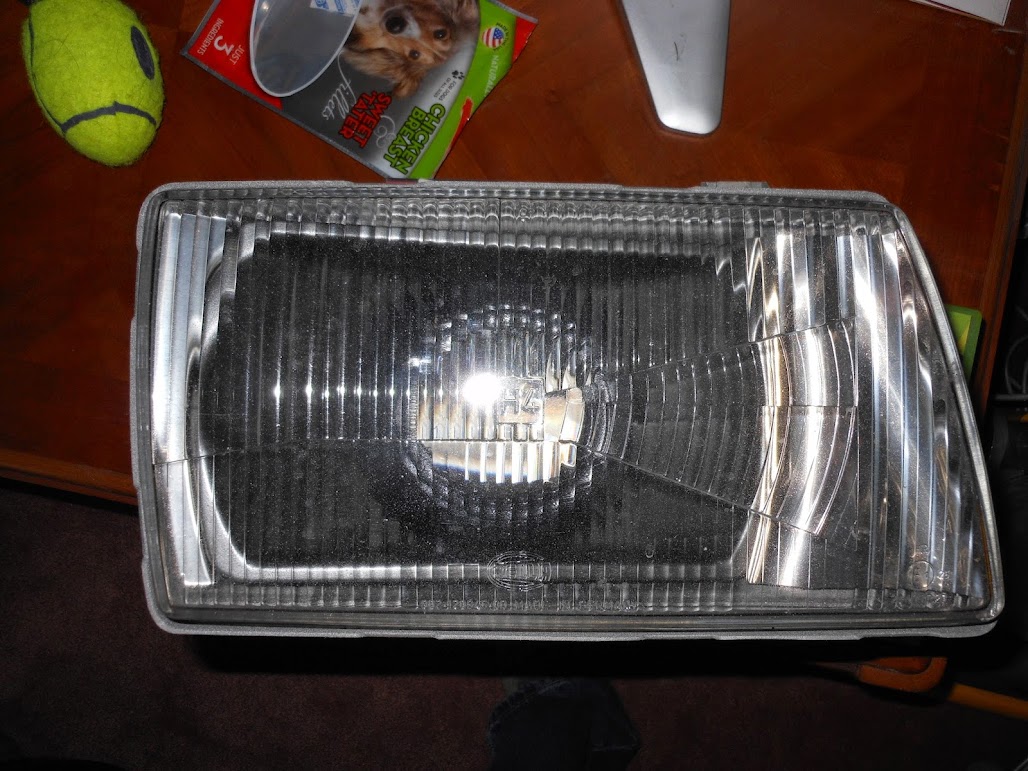
-Disassemble. The e-codes are not "sealed" the lens is just held in place with a bunch of little spring type clips. Slide them over a bit, and carefully pop them off.
Image
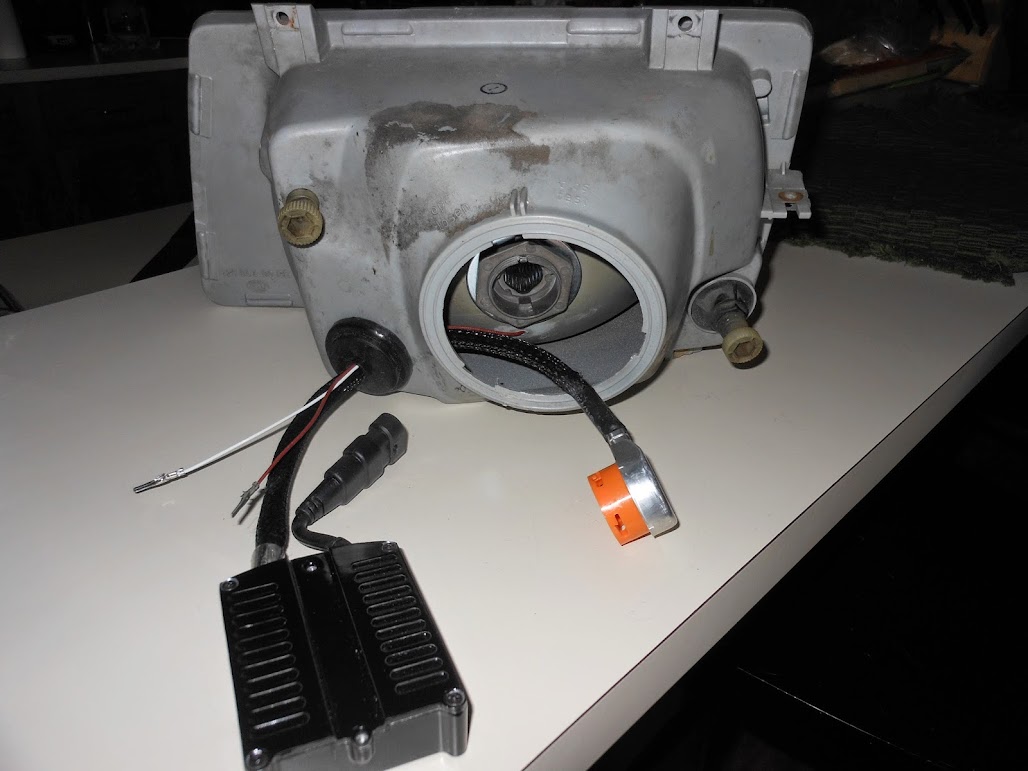
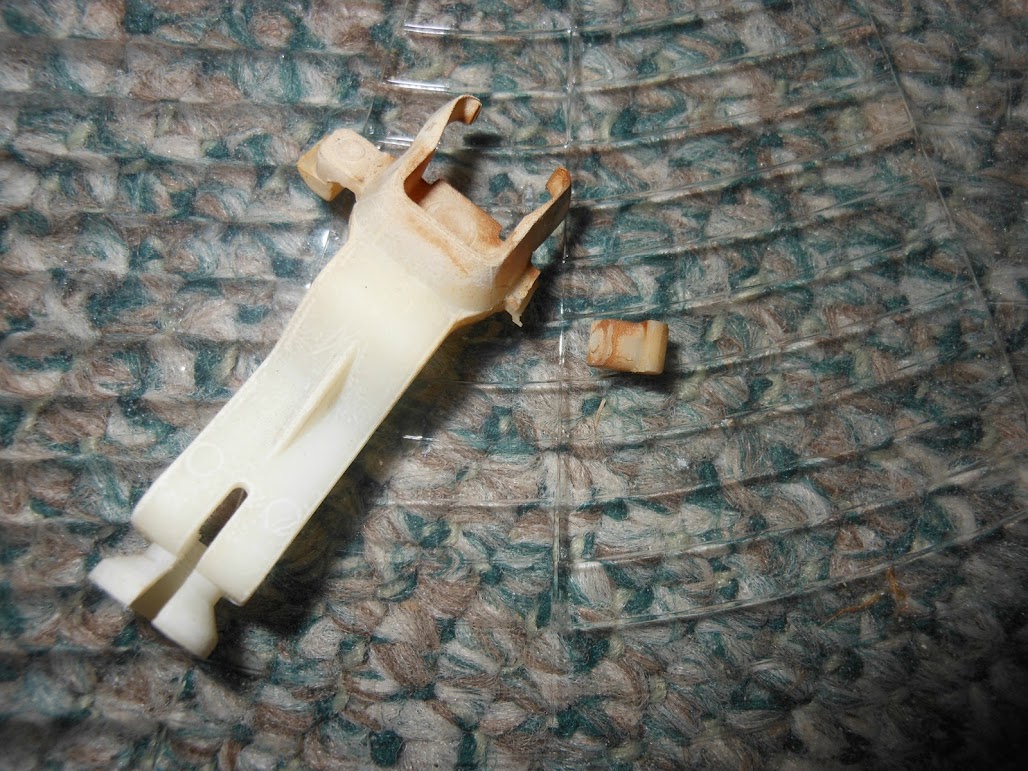
Once the lens is off you can remove the reflector by loosening the adjusters all the way and removing the 1 screw that holds the little pivot bushing thingy in place.
Image
Once the reflector is out you may be able to very carefully removed the adjuster arms, but they are very fragile!
Image
DO NOT try to remove the pivot bushing (red in picture), the tabs on it will break, I promise you. There is really no need to remove it from the reflector anyhow, you can paint around it.
Be sure to carefully inspect everything BEFORE disassembling. Stuff may be broken that you don't think is (these lights are really old remember). This light looked perfect until I took the lens off, and it came off in pieces... It may have functioned fine for years to come if I hadn't gone trying to screw with it.
Image
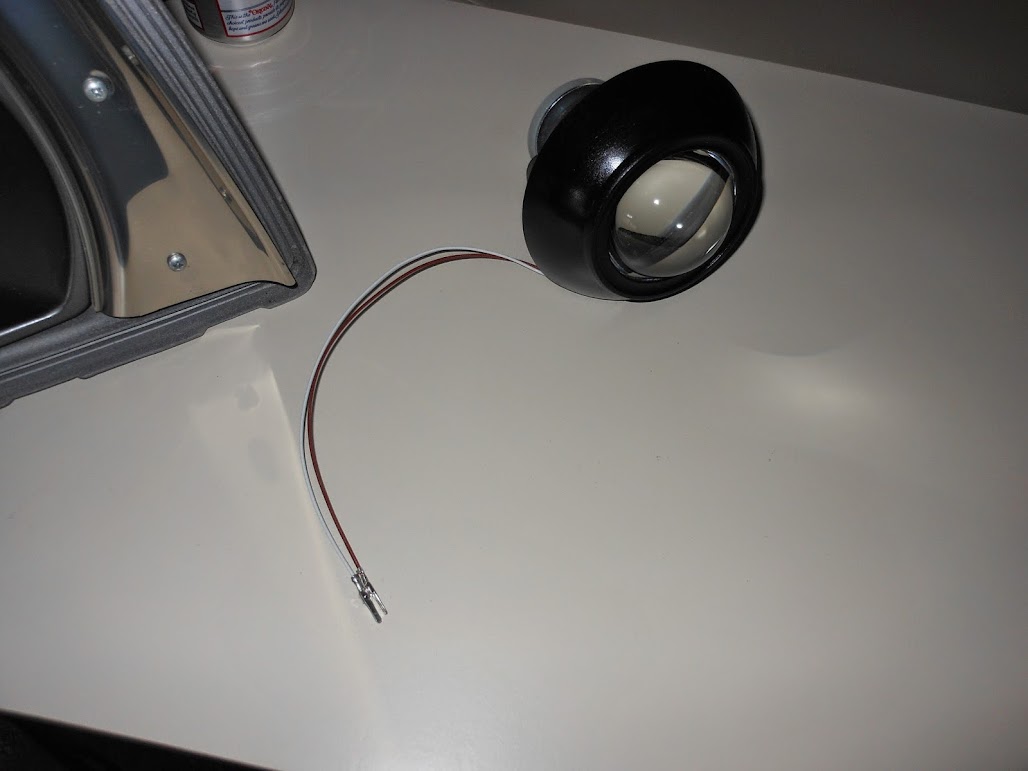
Next you'll need to remove the bulb holder/shroud from the reflector. I just used some pliers and kinda bent it around until it popped out. Be careful not to tweak the reflector at all.
Image
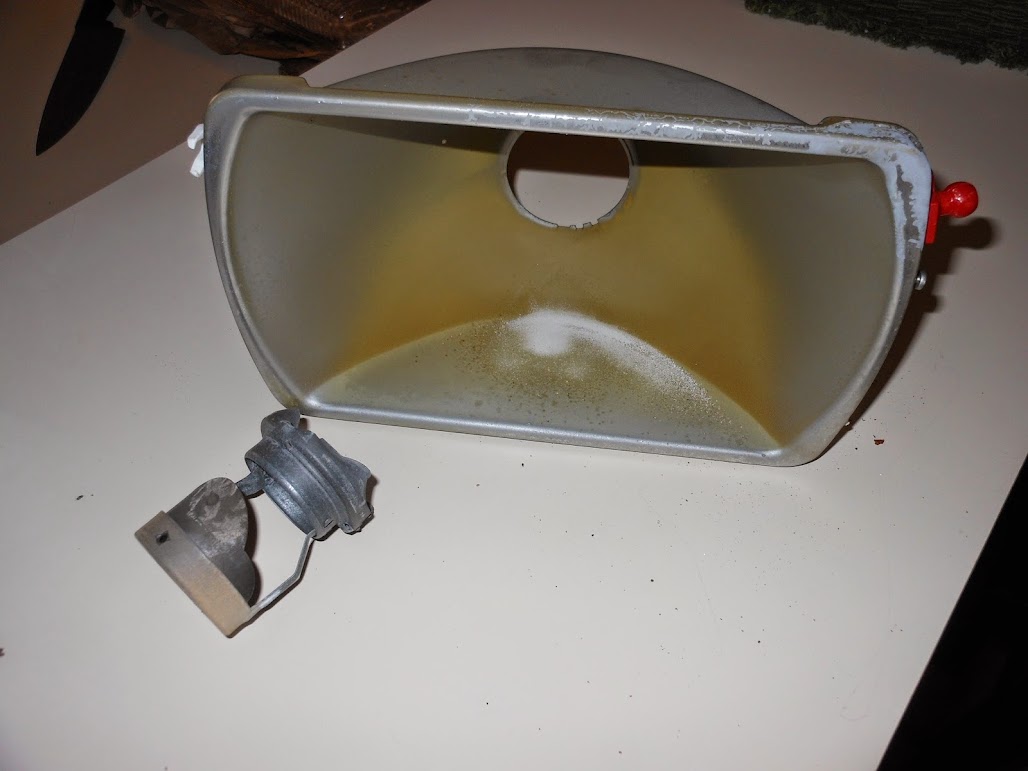
Now you should have pretty much everything separated! Nice work if you didn't break anything that wasn't broken already.

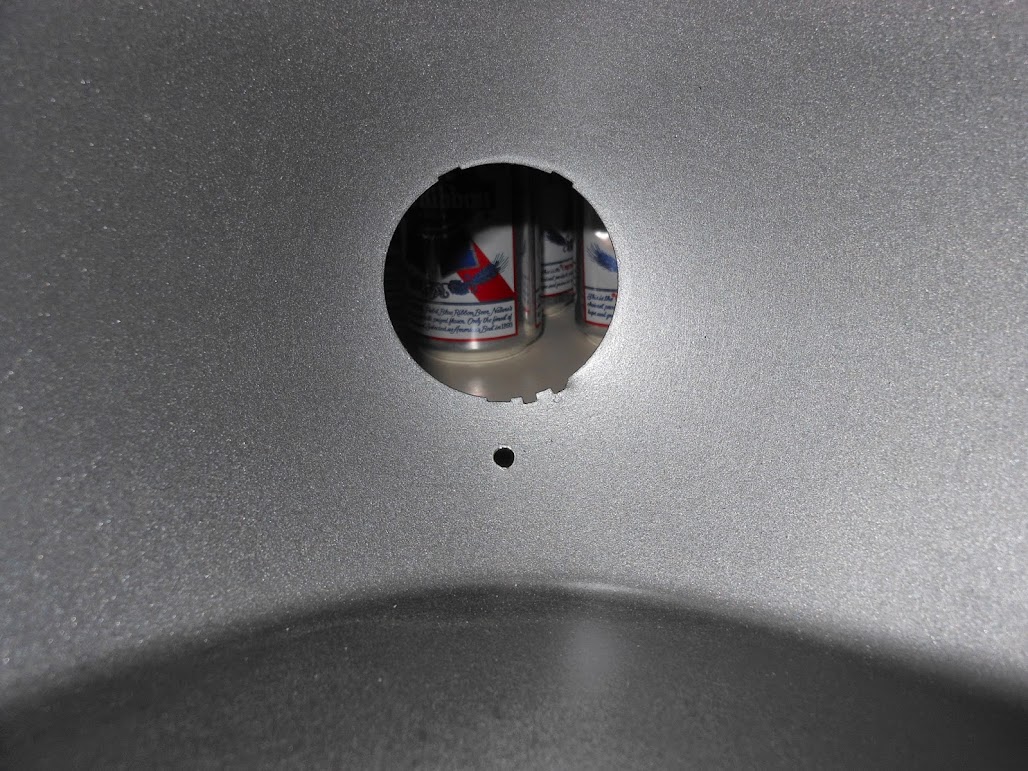
This part won't make any sense now, but you'll see why later. Drill a small hole (maybe 1/8") a little below the opening in the reflector. Like this:
Image

Now take a break and figure out what colors you want to paint everything!
You'll have 3 pieces that are really worth painting IMO. (I am not going to get into the specifics of how to prep/paint. That stuff should be pretty obvious by now hopefully)
-The bucket (you don't really see anything except for the edges, but it would still look nice cleaned and hit with some fresh paint)
-The reflector (the whole reason I did this project was because mine had totally pealed of the original mirror type coating). You can see what mine looked like above.
-The shrouds. You don't need to paint the shrouds that come with the projectors, but the tacky chrome they come in just seems really cheesy to me, but do as you please with them.

-Break-
03 9-5 Aero Wagon 5 spd M/T
85 900 turbo 5 spd 105k miles - Trionic 5ed in a day

Cark
Posts: 168
Joined: Sat Jul 16, 2011 9:02 am
Number of Saabs currently owned: 2

Re: How To - Projector Retrofit E-codes!

Postby Cark » Thu May 15, 2014 9:42 am

I recommend putting the projectors into the reflectors BEFORE the reflector is reinstalled into the bucket. This makes everything much easier to handle. After you can just drop everything right into the bucket and secure it all.

Putting the projectors into the reflectors required a bit of creativity. The reason being is that the opening in the reflector is MUCH larger than the projectors are intended for. I think in most retrofits the bulb hole in the reflectors actually needs to be drilled LARGER to fit the projector. In my case I went to the hardware store and found some large bushings/washers where the ID was large enough to fit around the projector base, and the OD was large enough to cover the hole in the reflector. I got 2 for each projector, one each for inside and outside.

Sorry I don't have detailed pictures of this stuff...

The projectors come with some different nuts and a rubber washer type gasket thing to keep it from sliding around in the reflector. Even the "large" rubber washer is smaller than the opening in the reflector. SO, what I did is dropped one of my new larger bushings onto the reflector, then slid the rubber washer thing on. This way my bushing would sort of act to "flare" out the rubber washer (which is intended to sort of wrap around the spherical back of the projector) therefore filling the hole in the reflector (but only just barely). You may have better results if you can find larger bushings/washers, but I had to be very careful to keep everything centered when inserting into the reflector.

So then on the back side of the reflector I used another large bushing/washer, and then used the large hex nut that comes with the projectors. They also come with a 3 pronged "key" that I used at first. This key is meant to keep the projector centered and clocked correctly when going into an H4 opening. I had put it on initially between my bushing and the nut, but later found out that A: it served no purpose in this application, and B: it pushes the hex nut out too far and prevents the bulb holder from tightening down all the way and doesn't allow you to plug the harness to the bulb! I had to completely disassemble one light once I realized I had made this mistake.

Hopefully you're still following here, again, I apologize for not having pictures.

Now, assuming you've gotten everything snugged down and the projector is securely tightened down onto the reflector, you can go ahead and install it all back into the bucket. It's just the 2 adjuster arms and the 1 screw for the pivot bushing.

Now you'll see the point of that little hole you drilled earlier. Go ahead and plug in the little wiring connector for the high beam actuator (hopefully you've followed the directions with the projector and already tested the actuator 50 or so times with a 9v battery). At this point you're stuck with 2 wires just kinda hanging out in the reflector, wtf? Carefully feed those two wires through the little hole you drilled. Ideally you would have some sort of grommet here, but I see NO reason that these wires would be moving around and there would be any risk of them being cut by the edges of the hole.

This is the one I had to take back apart. So the wire is plugged in and the shroud is on before it's in the bucket.
Image

Install the shroud (hopefully you came up with a better color for it than chrome). It simply snaps into place around the outer edge of the projector.
If for any reason you needed to get at the connector for the HB actuator, you'll have a hard time doing it with the shroud on, so get it all tidied up before snapping the shroud on, they don't seem to want to come off all that easily.

At this point you should be getting there and seeing the light (no pun intended) at the end of the tunnel. The projector is in the reflector and everything is in the bucket.
Image
At this point it's probably a good time to reinstall the lens. Make sure it's clean inside and out, and it's probably not a bad idea to clean up the gasket too, just to make sure everything seals up nice and tight. The spring clips can be a bit of a pain to get back on, but stick with it. Just be careful not to put too much pressure on the middle of the lens. I am always terrified of cracking one, they seem to be getting nearly impossible to replace these days.
Image

Now you can start thinking about your ballasts and bulbs.
Image
^This is a good shot because you can actually see the larger bushing/washer I used (shiny) and the large hex nut used to hold everything into the reflector.
You can also see the 2 wires for the HB actuator coming through.

The grommet that comes with the ballasts actually fits perfectly in the hole that was already in the buckets for the wiring! Amazing right?
Image
I also fed the 2 wires for the HB's through there too.
Image

You're basically done! All you've got left is to install the bulbs and plug them in (following directions again, don't touch the bulbs, clean them with alcohol wipes before installing). With the lights 100% assembled and sealed, you're ready to put them back in the car and get them wired up. The wiring is very straightforward, and everything on the controller harness is clearly marked. I had plenty of length to get everything where it needed to be. You can buy longer extensions if for any reason you had to, but I doubt you would.

Hopefully this helps anyone out looking to do a similar project. I'm really not sure how this would go on other lights or even slant nose e-codes?

So far everything is working perfectly, and as I had hoped, the adjusters still work as intended and can help get the aim dialed in. The cutoff is clean, even behind the e-code glass, and the light output is remarkable!
03 9-5 Aero Wagon 5 spd M/T
85 900 turbo 5 spd 105k miles - Trionic 5ed in a day

Cark
Posts: 168
Joined: Sat Jul 16, 2011 9:02 am
Number of Saabs currently owned: 2

Re: How To - Projector Retrofit E-codes!

Postby Cark » Thu May 15, 2014 9:43 am

A good side by side, before and after
Image

And done
Image

Image

They work!
Image

Image

The fogs now look grossly out of place, so I just won't use them for the time being. Eventually I would like to upgrade those to HID's!
03 9-5 Aero Wagon 5 spd M/T
85 900 turbo 5 spd 105k miles - Trionic 5ed in a day

User avatar
DrewP
Posts: 2084
Joined: Wed Dec 26, 2007 8:27 pm
Nickname: TANK
Number of Saabs currently owned: 1
Location: Monrovia, CA

Re: How To - Projector Retrofit E-codes!

Postby DrewP » Thu May 15, 2014 11:10 am

Nice writeup, thanks! That doesn't look like a bad job at all.
"You can educate ignorance, but you can't fix stupid."

User avatar
Geoff
Team Turbo Troll Crew
Posts: 3890
Joined: Fri Oct 20, 2006 3:31 pm
Nickname: Geoff
Number of Saabs currently owned: 6
Location: Nude Humpshire

Re: How To - Projector Retrofit E-codes!

Postby Geoff » Thu May 15, 2014 11:53 am

Nice! Years ago I bought a used HID H4 kit. It consisted of the ballasts and a bulb in a special holder that fits into an H4 socket. There was a high beam actuator (which was always sticking) and no projector (just the bulb in the regular headlight). I was always blinding oncoming cars because the beam pattern in the headlight wasn't designed for the luminous area of an HID bulb so I ended up taking them out. But they were bright! Apparently the company that made that retrofit kit got into some legal troubles with the DOT...

How long do they take to power up/full light output when they're switched on? Mine took probably 15-30 seconds...

I sort of want to do these projectors to some of my cars but I can easily see spending a full weekend and $1000 doing three cars ;)

Ideally you would have some sort of grommet here, but I see NO reason that these wires would be moving around and there would be any risk of them being cut by the edges of the hole.


Vibration? I'd probably just pull the rear covers off the Ecodes and smear some RTV around the wire/hole to keep them from vibrating against the hole.
The kind of dirty that doesn't wash off :eyebrows:

Cark
Posts: 168
Joined: Sat Jul 16, 2011 9:02 am
Number of Saabs currently owned: 2

Re: How To - Projector Retrofit E-codes!

Postby Cark » Thu May 15, 2014 12:00 pm

Thanks guys!

Not only is the lighting a huge improvement, I think the front end of the car looks 10x better as well! It's almost like a newer mustang or something with the black out headlights.

They come on almost immediately, but it does take maybe 30 seconds or so for the beam to get "hot". As you can see in the pics the light looks a bit blueish, but once warmed up its clean white as the 4300k bulbs should be. 5000k bulbs tend to be more blue all the time. If/when I get around to doing the fogs I'll go with 3000k as that should look yellow/amber.

Some RTV is a great idea Geoff, that would be quick and easy and I could do that right through the hole in the back of the bucket.

I have an HID kit in my Aero wagon, and yeah, I got a lot of people flashing me and they are bright as hell. Finally I dipped the beams a bit and rarely do I get flashed since then and I've never had any issues with the 5-0 (it's been a couple years with them at this point).
03 9-5 Aero Wagon 5 spd M/T
85 900 turbo 5 spd 105k miles - Trionic 5ed in a day

User avatar
Crazyswede
Team Turbo Troll Crew
Posts: 4540
Joined: Fri Sep 22, 2006 3:53 pm
Nickname: Mongo
Number of Saabs currently owned: 97
Location: Vermont
Contact:

Re: How To - Projector Retrofit E-codes!

Postby Crazyswede » Thu May 15, 2014 1:59 pm

How well does the light work with the lense pattern on the stock headlight?
I am the 73%

Cark
Posts: 168
Joined: Sat Jul 16, 2011 9:02 am
Number of Saabs currently owned: 2

Re: How To - Projector Retrofit E-codes!

Postby Cark » Thu May 15, 2014 3:54 pm

The projector behind the e-code glass (I think that's what you're asking) seems great. Of course I haven't seen it coming at me on the road yet. But it seems very clean despite not being behind a clear lens. The cutoff is not quite like intended. If you go on the website for the projectors or look anywhere online, they have a total light to dark cutoff, which doesn't make much sense to me, because normal/stock headlights don't function this way? I mean say a dear comes prancing across the road and jumps high and right over your beam cutoff? You'd never even see it! So with these you can see a pretty clean cutoff of the really bright light, then there is another cutoff a bit higher up, but of much lesser and more diluted light. Of course this is caused by the lens and it being meant for a reflector setup, but I think with proper aiming it can be tuned so as not to offend anyone on the road.

I mean hell, half of the new cars with their "auto such and such bi-xenons" that stop working after a year or two and point in every which direction are much worse I'm sure :p
03 9-5 Aero Wagon 5 spd M/T
85 900 turbo 5 spd 105k miles - Trionic 5ed in a day

Cark
Posts: 168
Joined: Sat Jul 16, 2011 9:02 am
Number of Saabs currently owned: 2

Re: How To - Projector Retrofit E-codes!

Postby Cark » Fri May 23, 2014 6:49 am

Still need to get out and get some "wall" shots, but this is a start.

Finally got out at night and took some pictures of the beam and cutoff of the projectors.

Image

Image

Image

Definitely haven't put many night miles on at all, but so far so good! Haven't been flashed by any oncoming traffic or anything.
03 9-5 Aero Wagon 5 spd M/T
85 900 turbo 5 spd 105k miles - Trionic 5ed in a day


Return to “Projects and Build Threads”

Who is online

Users browsing this forum: No registered users and 11 guests